
Sound Collection
Broadcast and field recordings alike are only raw material at first, just recordings and nothing more. Only when you cut out the unwanted parts, collect your favorite pieces and arrange them to your taste does a cassette become truly yours. You want the intervals between pieces, the fade-ins and fade-outs to be just the way you like them.
Since it is a cassette for yourself, you want to be able to find it immediately when you feel like listening. It is also enjoyable to design it so that simply holding it gives you pleasure. There are quite a few things to do.
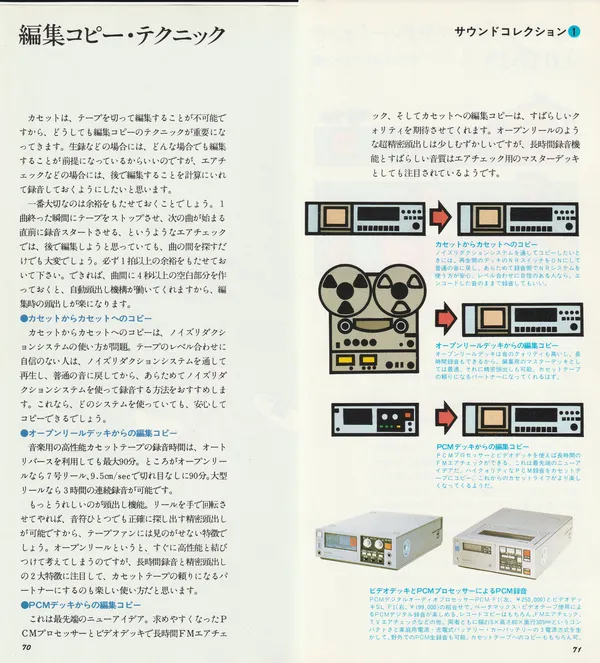
Editing Copies. Sound Collection No. 1
Cassette tape cannot physically be cut and spliced for editing, so the technique of making an edited copy is especially important. Field recordings are normally made with editing in mind from the start, so there is no problem there, but when recording broadcasts you should plan ahead for later editing.
The most important thing is to leave some margin. When recording a broadcast, if you stop the tape the instant one piece ends and start again immediately before the next begins, you will later have trouble even finding the joins when you want to edit. Always leave at least one musical bar. If you can leave a blank interval of four seconds or more between pieces, the automatic track-search mechanism will work, making it much easier to find the start of each track while editing.
Copying from Cassette to Cassette
When copying from cassette to cassette, the question is how to use noise reduction. For anyone unsure about setting recording levels, we recommend playing the source tape through its noise reduction system to restore normal sound, then recording it again through noise reduction. With this approach, you can copy confidently whatever system you use.
Editing a Copy from a Reel-to-Reel Deck
Even with auto-reverse, high-quality music cassettes offer a maximum recording time of 90 minutes. A seven-inch reel at 9.5 cm/sec gives 90 minutes without a single interruption. Larger reels permit continuous recordings of up to three hours.
Even more appealing is the ability to find the beginning of a track. By turning the reel by hand, you can reach the desired point to within a single note, precisely locating the start. Tape enthusiasts should not overlook this feature. Reel-to-reel decks are usually associated with high sound quality, but looking at their two major advantages - long recording time and precise location of the start - and using one as a reliable partner for cassette is also a very enjoyable approach.
Editing a Copy from a PCM Deck
This is the newest, most advanced idea. A PCM processor combined with a video deck for long FM recordings has become more accessible, and an edited cassette copy can be expected to have excellent quality. Finding the start with the extreme precision possible on a reel-to-reel deck is a little harder, but the long recording time and excellent sound are already attracting attention for use as a master deck for broadcast recording.
Copying from cassette to cassette (caption to page 71): When copying with noise reduction, the safer method is to turn on NR on the playback deck to restore normal sound, then apply NR again on the recording deck. Those confident in setting the level can also record directly from the encoded sound.
Editing a copy from a reel-to-reel deck (caption to page 71): A reel-to-reel deck offers both high sound quality and long recording time, making it ideal as a master deck for editing. It also allows precise location of the start. It should be a reliable partner for cassette.
Editing a copy from a PCM deck (caption to page 71): A PCM processor and video deck can make long recordings from FM broadcasts. This is the newest, most advanced idea: high-quality PCM recording followed by copying to cassette. Cassette life looks set to become even more interesting.
PCM recording with a video deck and PCM processor (caption to page 71): Combining the PCM-F1 digital audio processor (left, ¥250,000) and SL-F1 video deck (right, ¥199,000) lets you enjoy digital PCM recording on Betamax videotape. Besides copying records, FM and TV broadcasts and other sources can naturally be recorded. Thanks to the compact size of both units (215 mm wide × 80 mm high × 305 mm deep) and three-way power from household mains, a rechargeable battery or a car battery, digital PCM field recording outdoors is also possible. Copying to cassette is of course possible too.
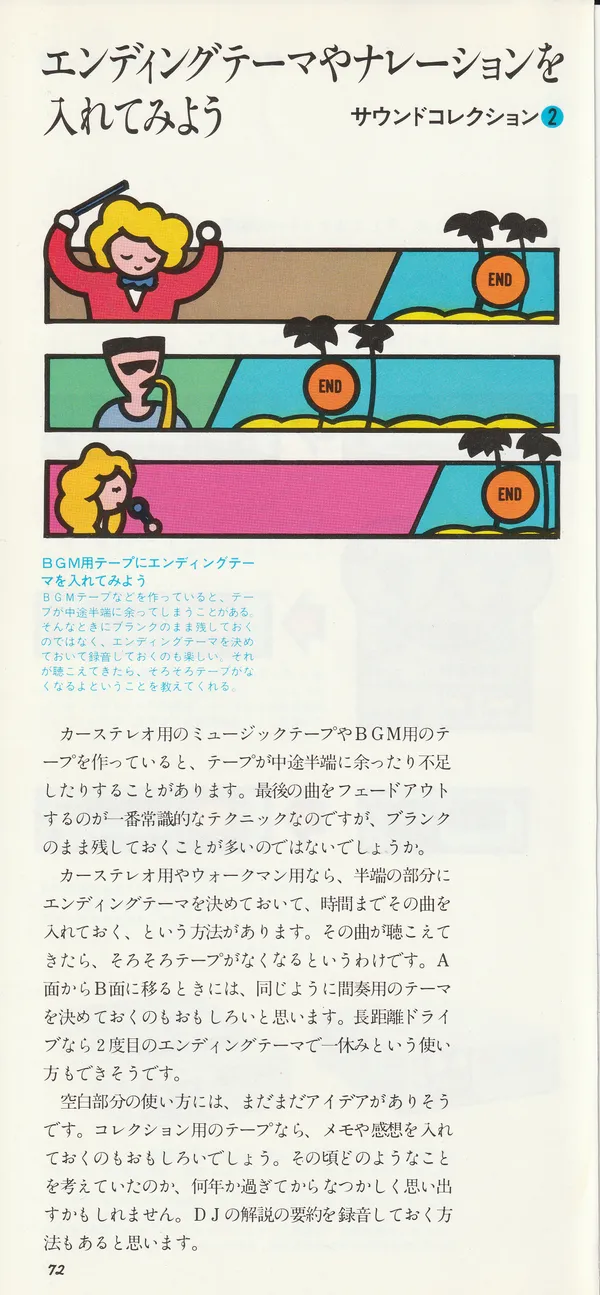
Try Recording an Ending or a Voice-Over. Sound Collection No. 2
Try adding an ending to a background music cassette (caption to page 72): When making background music cassettes, an awkward length of tape often remains. Instead of leaving it blank, choosing an ending in advance and recording it in that space can be fun. When you hear it, you know the tape will soon end.
When making a cassette for a car stereo or background music, you may have an awkward amount of tape left over, or find there is not enough. The standard technique is to fade out the last piece, but most often the remaining blank tape is simply left as it is, isn’t it?
For a car stereo or Walkman, you can choose an ending in advance and record it on the remaining tape right to the end. When you hear it, you know the tape will soon finish. You can also choose a theme or instrumental interlude for the change from side A to side B. On a long journey, a second ending can signal that it is time for a break.
There are many other ideas for using blank sections. For a collector’s cassette, it can be interesting to record notes and impressions. Years later, what you were thinking at the time may return with a sense of nostalgia. You can also record a summary of the DJ’s comments.
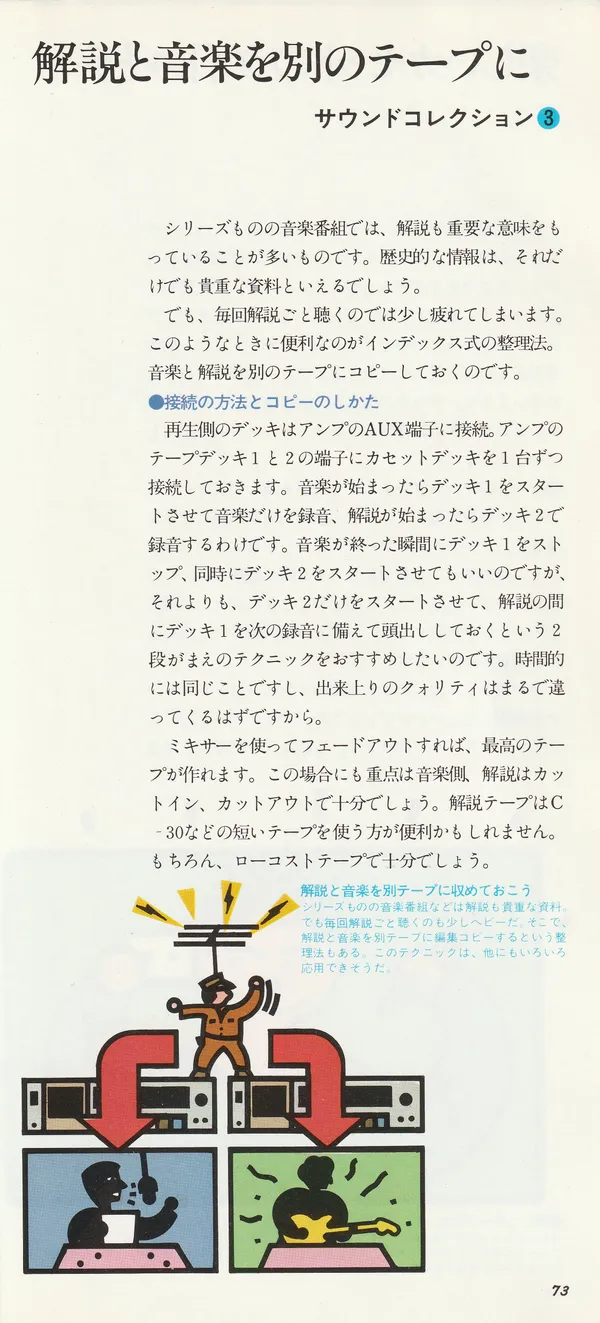
Put Commentary and Music on Separate Cassettes. Sound Collection No. 3
In serialized music programs, commentary is often just as important. Historical information is valuable material in its own right.
But listening to everything with the commentary every time can be a little tiring. An index-based approach is useful here: make separate copies of the music and commentary on different cassettes.
Connections and Copying Procedure
Connect the playback deck to the amplifier’s AUX input. Connect one cassette deck each to the amplifier’s TAPE DECK 1 and TAPE DECK 2 connections. When the music begins, start deck 1 and record only the music; when commentary begins, record it on deck 2. You could stop deck 1 when the music ends and start deck 2 at the same time, but we recommend a two-step technique: start only deck 2, and while the commentary plays, cue deck 1 to the beginning of the next recording. It takes the same amount of time, but the resulting quality is quite different.
If you use a mixer and fade out, you can make an excellent cassette. But the emphasis here is on the music side; simple starts and cuts are sufficient for commentary. A short cassette such as C-30 may be more convenient for the commentary, and an inexpensive tape is of course sufficient.
Collect commentary and music on separate cassettes (caption to page 73): Commentary in serialized music programs is valuable material too. But listening to it all every time can be a little tiresome. One way to organize it is to make edited copies of the commentary and music on separate cassettes. This technique may be useful in other situations as well.
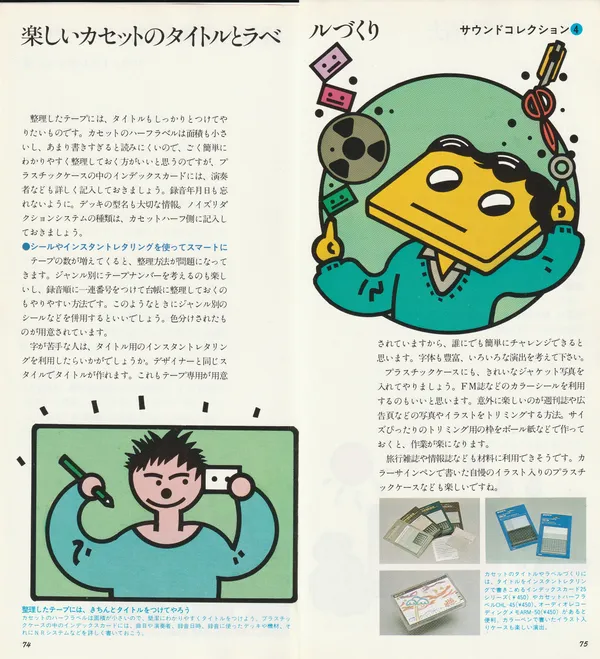
Have Fun with the Title and Label. Sound Collection No. 4
A neatly organized cassette deserves a proper title. The label on the cassette shell has little space, and too much writing makes it difficult to read, so it is better to keep it clear and simple. Put more detail about the performers and so on on the index card inside the plastic case. Don’t forget the recording date. The deck model is important information too. Write the type of noise reduction system on the cassette shell.
Stickers and Instant Lettering for Tasteful Designs
Once you have many cassettes, organizing them becomes a problem in itself. You can devise cassette numbers by genre, which is interesting, or assign consecutive numbers in recording order and keep a catalog, which is convenient too. Genre stickers can be used alongside either method. They are sold in ready-made color sets.
If you have difficulty with handwriting, how about instant lettering1 for titles? You can make titles in the same style as designers. Sets made especially for cassettes are available, so anyone can try. There is a wide variety of typefaces; invent different ways to use them.
Put a beautiful cover photograph in the plastic case too. Colored stickers from FM magazines are a good option. Cropping photographs and illustrations from weekly magazines and advertisements is unexpectedly enjoyable. If you make a cardboard cropping frame to the exact size beforehand, the work will be much easier.
Travel magazines and information magazines can also be useful. A plastic case with your own illustrations in colored markers is fun too, isn’t it?
A neat title for an organized cassette (caption to page 74): The cassette shell label has little space, so keep the title short and clear. On the index card inside the plastic case, record the track list, performers, recording date and time, deck and equipment used, and the NR system in detail.
Cassette design supplies (caption to page 75): For cassette titles and labels it is useful to have series 25 index cards (¥450), on which titles can be applied with instant lettering; CHL-45 cassette shell labels (¥450); and Audio Recording Memo ARM-50 (¥450). A case illustrated with colored pens is also an attractive design.
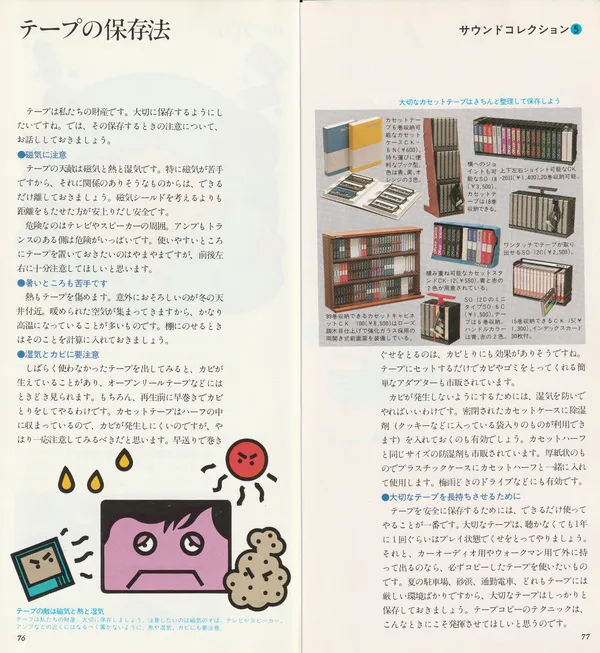
How to Store Tape. Sound Collection No. 5
Cassettes are our treasures. We want to look after them carefully. Let’s discuss what to watch for in storage.
Beware of Magnetic Fields
Tape’s main enemies are magnetic fields, heat and moisture. Magnetism is especially harmful, so keep cassettes as far as possible from anything associated with it. Moving tape farther away is cheaper and more reliable than arranging magnetic shielding.
Danger zones include the areas around televisions and loudspeakers. The side of an amplifier containing its transformer is also full of hazards. Naturally, you want cassettes close at hand in a convenient place, but please look carefully at what is in front, behind, to the left and to the right.
Heat Is No Good Either
Heat also damages tape. An unexpectedly dangerous place is near the ceiling in winter. Warm air collects there, and temperatures are often quite high. Bear this in mind when placing cassettes on a shelf.
Beware of Moisture and Mold
Sometimes you take out a cassette that has not been used for a long time and find mold; this occasionally happens with reel-to-reel tapes. In that case, of course, the tape must be wound through before playback to deal with the mold. Mold is less likely to develop on cassette tape enclosed in its shell, but it is still worth checking. Fast-winding to correct uneven winding also seems to work against mold. Simple adapters are sold that fit onto a cassette and remove both mold and dust.
To prevent mold, keep tape away from moisture. Putting desiccant in an airtight cassette case is effective; packets from cookie packaging and the like can be used. Moisture absorbers the same size as a cassette shell are also sold. They are shaped like thick cardboard and are inserted into the plastic case alongside the cassette. They can also be useful when driving during the rainy season.
Make Valuable Cassettes Last
The safest way to store tape is to use it more often. Even if you do not listen to valuable cassettes, run them in playback mode at least once a year to relieve deformation of the winding. Also, if you take a cassette outdoors for use in a car stereo or Walkman, always take a copy. A parked car in summer, a sandy beach and a commuter train at rush hour are all harsh environments for tape, so take good care of valuable originals. These are just the situations where cassette-copying techniques come in useful.
Tape’s enemies are magnetism, heat and moisture (caption to page 76): Cassettes are our treasures. Store them carefully. Watch areas near magnets. Avoid keeping them near televisions, loudspeakers and amplifiers where possible. Also beware of heat, moisture and mold.
Sony cassette storage products (caption to page 77): The CK-6N cassette case (¥600) holds six cassettes, has a portable book shape and comes in blue, yellow or orange. The SO-18 (¥3,500) can be joined horizontally and holds 18 cassettes. The CK-20II (¥1,400) joins above, below, left and right and holds 20. The SO-12C (¥2,500) lets you remove a cassette in one movement. The CK-12 cassette rack (¥550) can be stacked and comes in blue or red. The SO-6C (¥1,500), a mini version of the SO-12C, holds six cassettes. The CK-100 cassette cabinet (¥8,500) holds 99 cassettes and has a rosewood finish and double front doors of tempered glass. The CK-15 (¥1,300) holds 15 cassettes, has a blue or red handle and comes with 30 index cards.
Примечания
-
Instant lettering (Letraset is a trade name) consists of dry-transfer letters and typefaces on transparent film. In 1979 it was a principal way for enthusiasts and designers to produce professional-looking lettering without printing. Source: Wikipedia, “Letraset”. ↩