
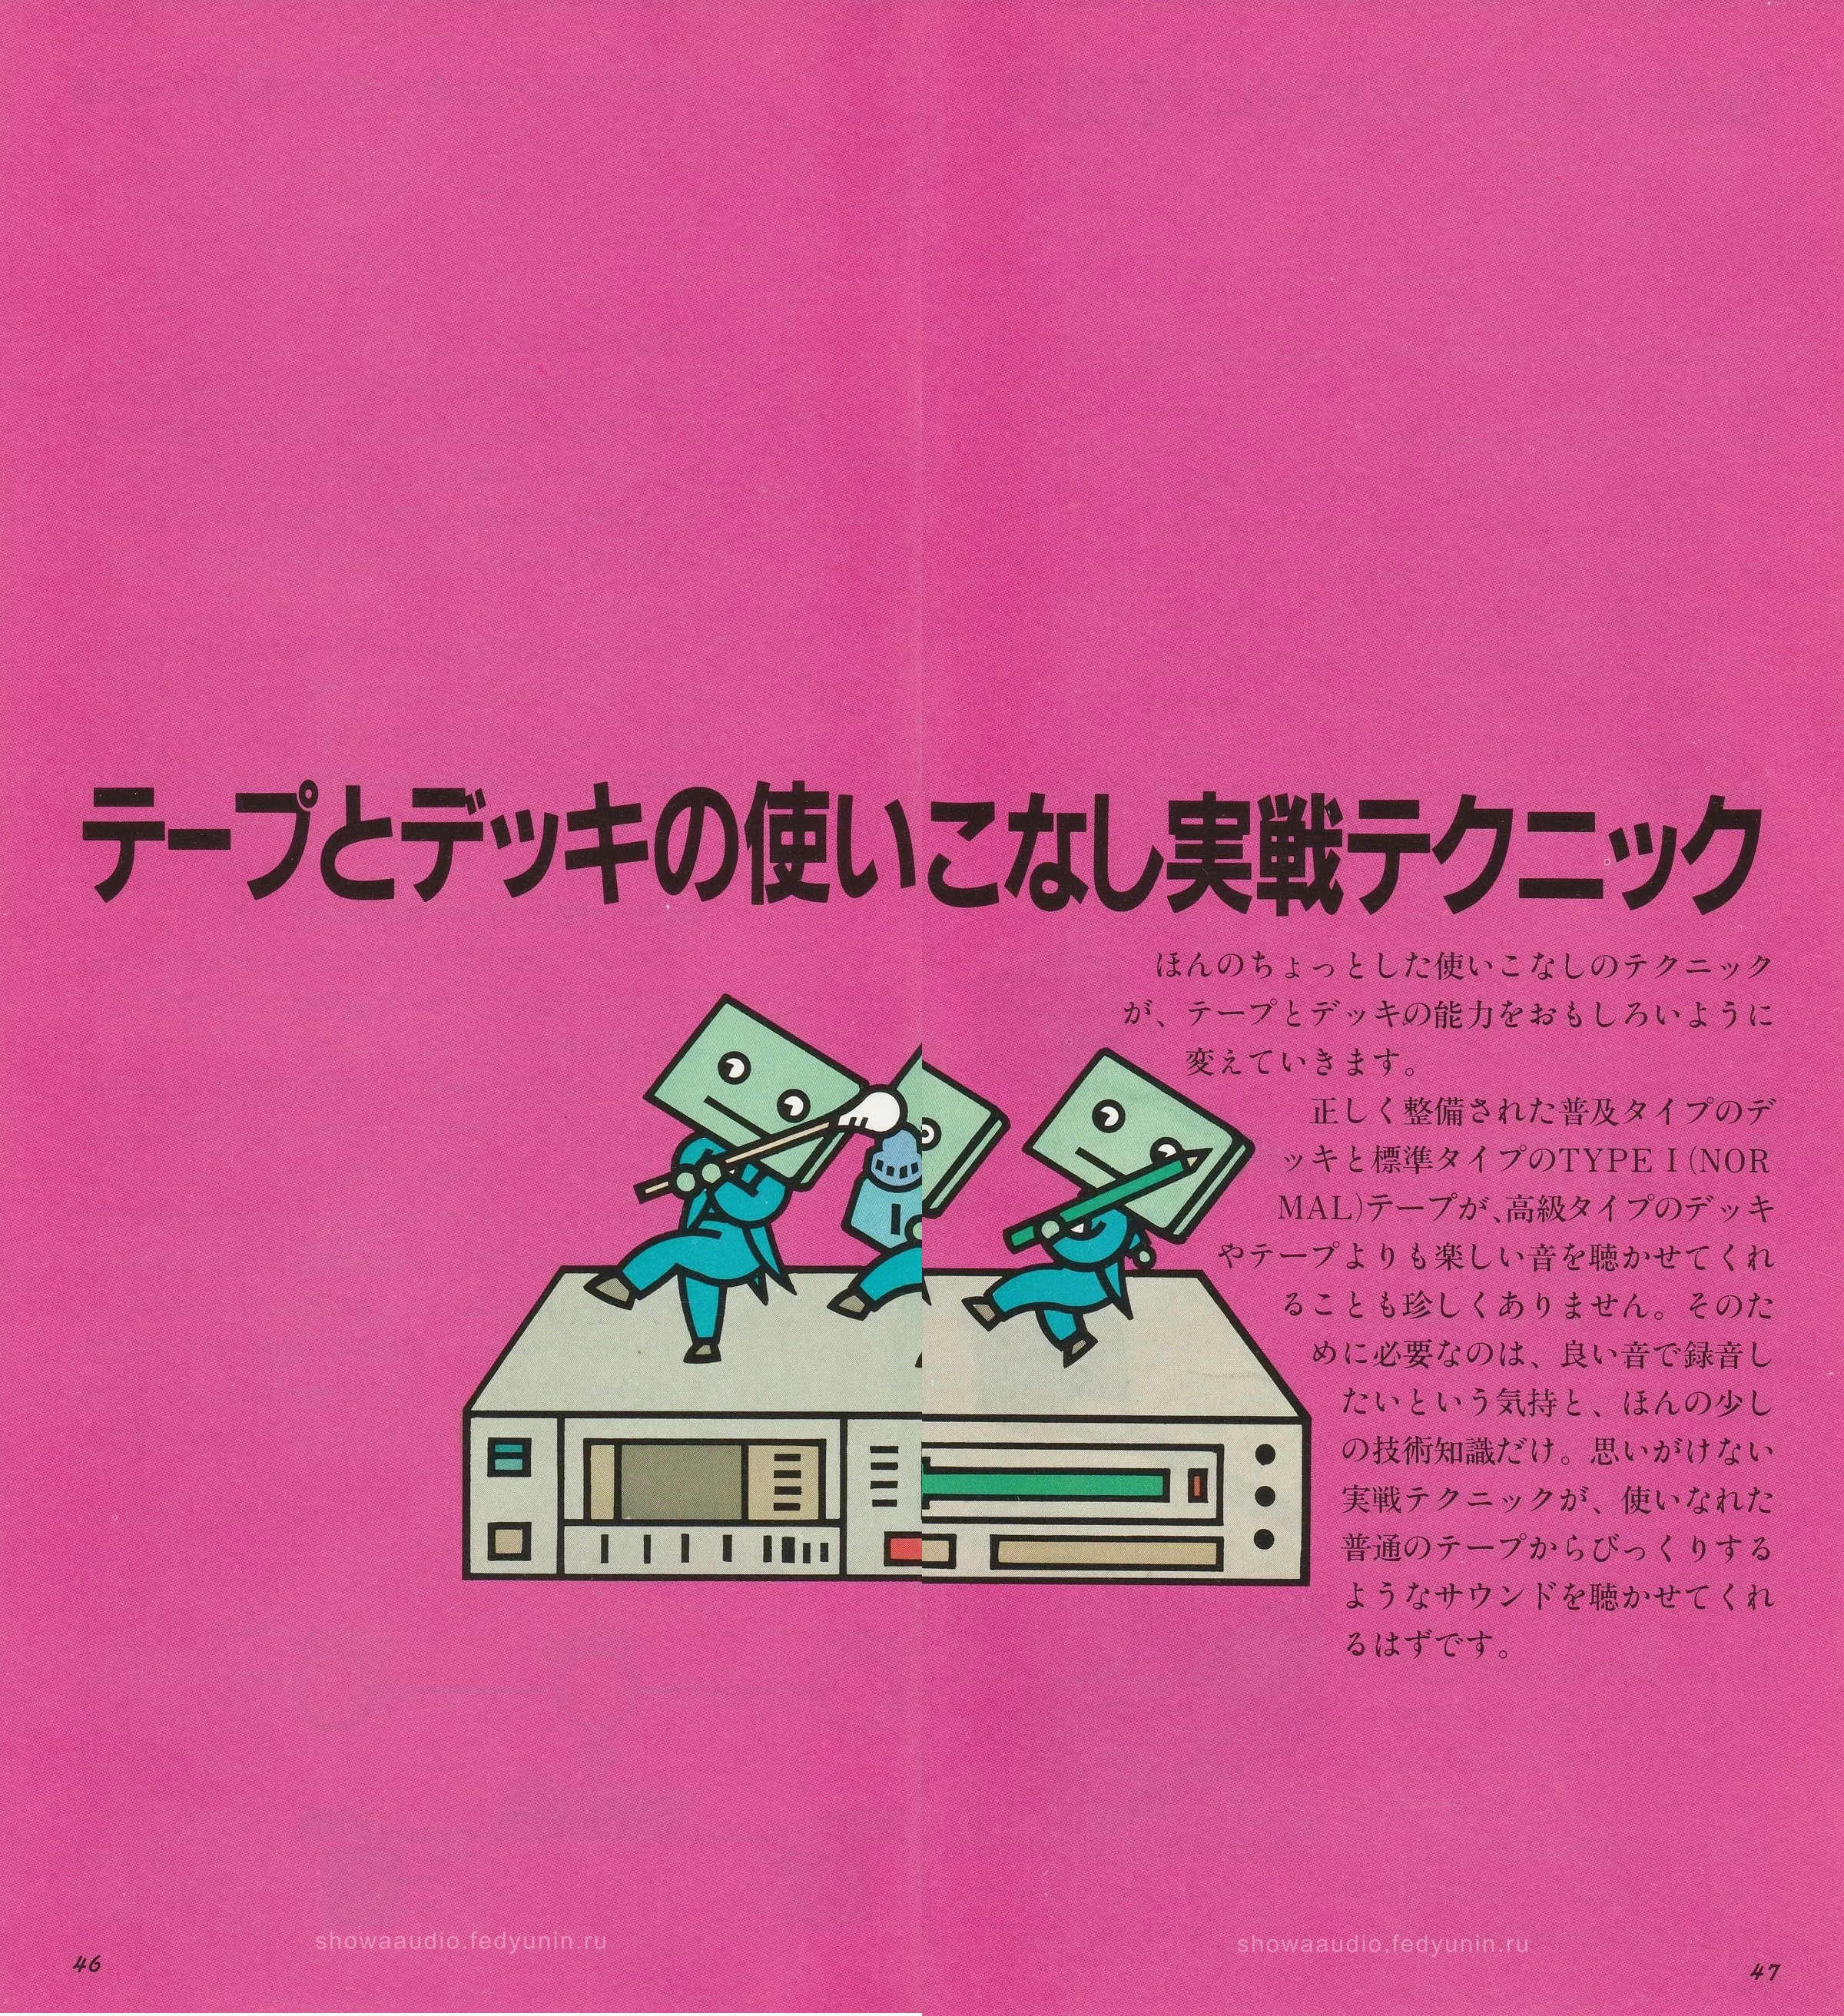
Practical Techniques for Tape and Deck
A little technique can change the capabilities of tape and deck in interesting ways.
It is not uncommon for a properly adjusted mass-market deck and standard TYPE I (NORMAL) tape to give a more enjoyable sound than a high-grade deck and tape. All you need is the desire to record good sound and a little technical knowledge. These unexpected practical techniques should give you surprising sound even from familiar ordinary tape.
What to Know Before Recording
Before recording, let’s get the tape and deck fully prepared.
Cleaning the Head / Pinch Roller1
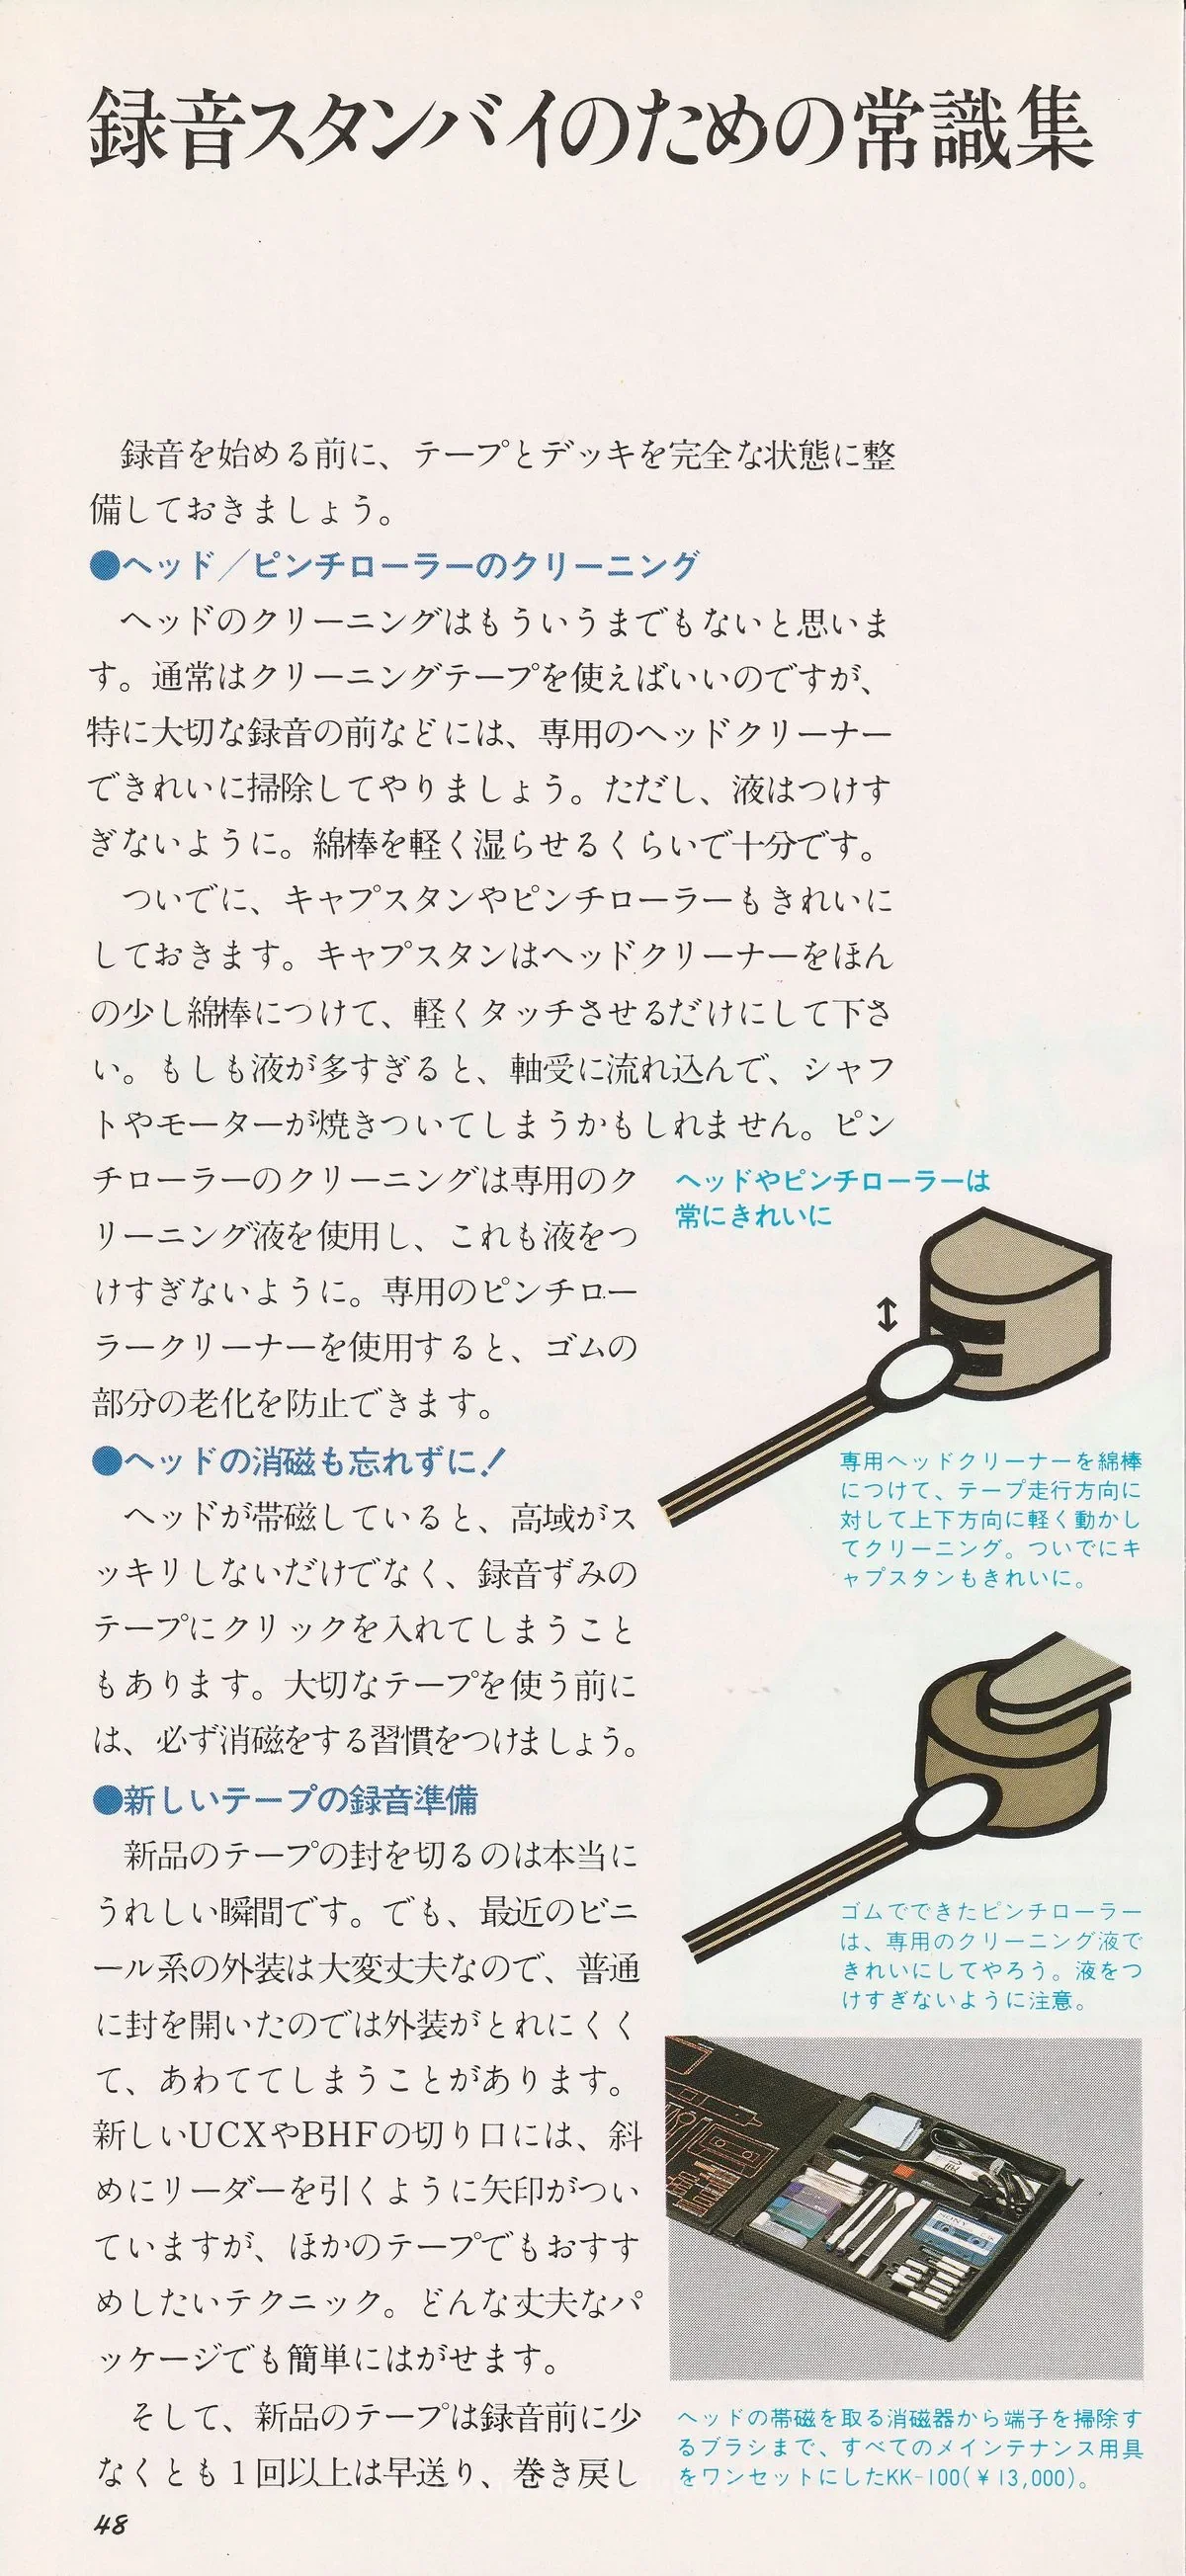
Head cleaning probably needs no explanation. A cleaning tape is normally sufficient, but before a particularly important recording, clean the head thoroughly with a dedicated head cleaner. Do not apply too much liquid: a lightly moistened cotton swab is enough.
Clean the capstan2 and pinch roller at the same time. Put just a little head cleaner on a swab for the capstan and touch it only lightly. Too much liquid can run into the bearing and damage the shaft or motor. Use a dedicated cleaning fluid for the pinch roller, again without using too much. A dedicated pinch-roller cleaner can prevent the rubber from aging.
Always keep the head and pinch roller clean (caption to page 48): Apply head cleaner to a cotton swab and move it lightly vertically, perpendicular to the direction of tape travel. Clean the capstan at the same time.
Cleaning the pinch roller (caption to page 48): Clean the rubber pinch roller with a dedicated cleaning fluid. Take care not to apply too much.
KK-100 maintenance kit (caption to page 48): From a demagnetizer for removing magnetism from the head to a brush for cleaning contacts, all the maintenance tools are collected in the KK-100 kit (¥13,000).
Don’t Forget to Demagnetize the Head!
If the head is magnetized, high frequencies will not only sound unclear; clicks may also appear on an already recorded tape. Make it a rule to demagnetize the head before using an important tape.
Preparing New Tape for Recording
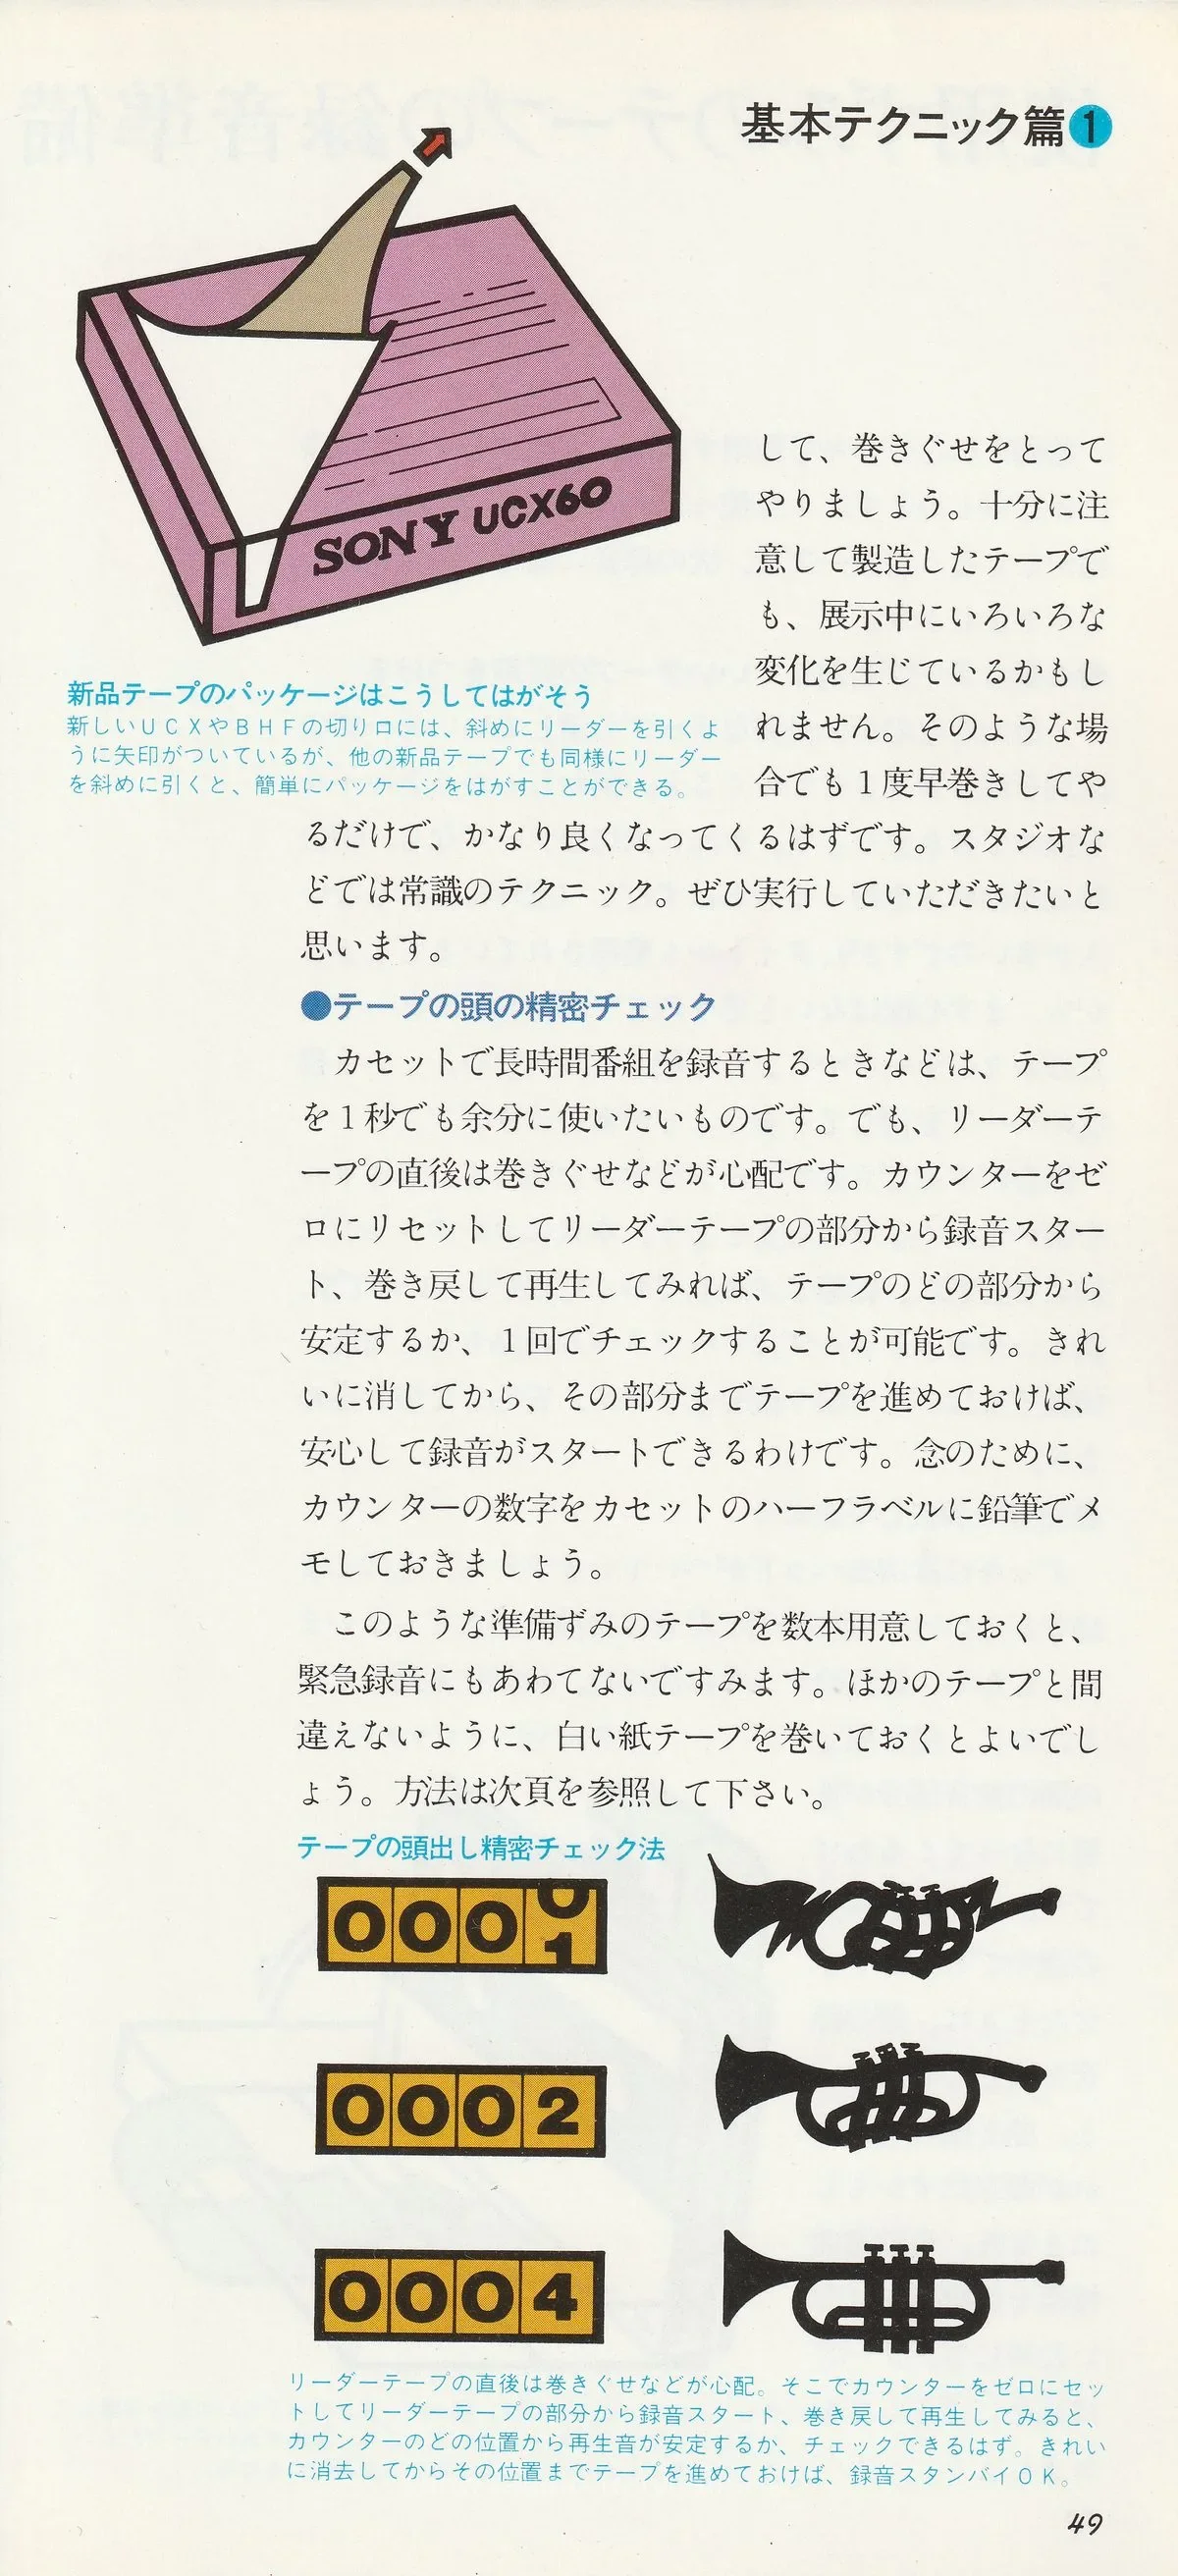
Opening a new tape is a joyful moment. But modern vinyl packaging is very strong, and it can be difficult to remove in the usual way, making you flustered. On the edge of new UCX and BHF packages an arrow shows that the tear strip should be pulled at an angle. We recommend this technique for other tapes too. Even strong packaging comes off easily.
Also, wind a new tape forward and back at least once before recording to relieve winding tension. Even a carefully made tape may have undergone various changes while stored on display. One fast wind is enough to improve it noticeably. This is basic studio technique, and we strongly recommend it to you too.
Removing new tape packaging (caption to page 49): An arrow on the edge of new UCX and BHF packages shows that the tear strip should be pulled at an angle. Pull the strip of any other new tape diagonally in the same way and the packaging comes off easily.
Precisely Checking the Start of a Tape
When recording a long program on cassette, you want to use every extra second. But immediately after the leader there may be residual deformation from winding. Reset the counter to zero and start recording at the leader, then rewind and play it. In one pass you can see where the tape begins to run steadily. Erase that section completely and wind to the required point, and you can start recording with confidence. For safety, write the counter reading in pencil on the cassette label.
If you keep several tapes prepared this way, you will not be flustered when recording in a hurry. Wrap them with white paper tape to distinguish them from the others.
Precisely checking the start of a tape (caption to page 49): There may be residual winding deformation immediately after the leader. Reset the counter to zero, start recording at the leader, rewind and play it. You should see the counter position where playback sound stabilizes. Erase the tape completely and wind to that position: it is ready to record.
Preparing Used Tape for Recording
Used in a properly adjusted deck, a cassette gives good sound. Even tape that has been used once retains its full performance. Let’s fully prepare tapes you no longer listen to for their next recording.
Distinguish Tape to Keep from Tape You Can Erase
The most important thing is to distinguish clearly between tape you need and tape that can be erased. Establish a firm rule. On truly important tape, the erase-protection tab3 should have been broken off (though surprisingly many people do not do this) and the title written down, so there should be little cause for concern. But tapes just recorded from the air4 or tapes you “thought you might want to keep” are often erased.
When you finish recording, always apply the cassette label and write the title. Until the tape formally enters your collection, a pencil note is enough. Labels on new cassettes can be repositioned: they can be peeled off and reapplied repeatedly, so you can write without worry.
Erase Completely
The deck has an erase head, so simply recording over a tape automatically erases the previous recording. But modern decks have high performance, and as automation increases, silent intervals between tracks become important. If you stop a broadcast recording without erasing the old one, the previous recording may emerge in the gap between tracks. Erase the tape completely so as not to confuse the automatic track-search system.
A dedicated tape demagnetizer, such as the BE-100, can erase it at high speed. Without one, you can erase it slowly on an old deck.
Check the Tape’s Condition
The beginning needs checking on new tape too, but used tape should be checked carefully. If you handled it carefully there is nothing to worry about, but a spare Walkman tape may have been kept without its case in a pocket or bag. Tape for a car audio system may also have suffered considerably from summer light and heat. At least check the most vulnerable sections at the beginning and end of the winding. The method is the same as for new tape: reset the counter to zero and make a test recording.
A Prepared Cassette
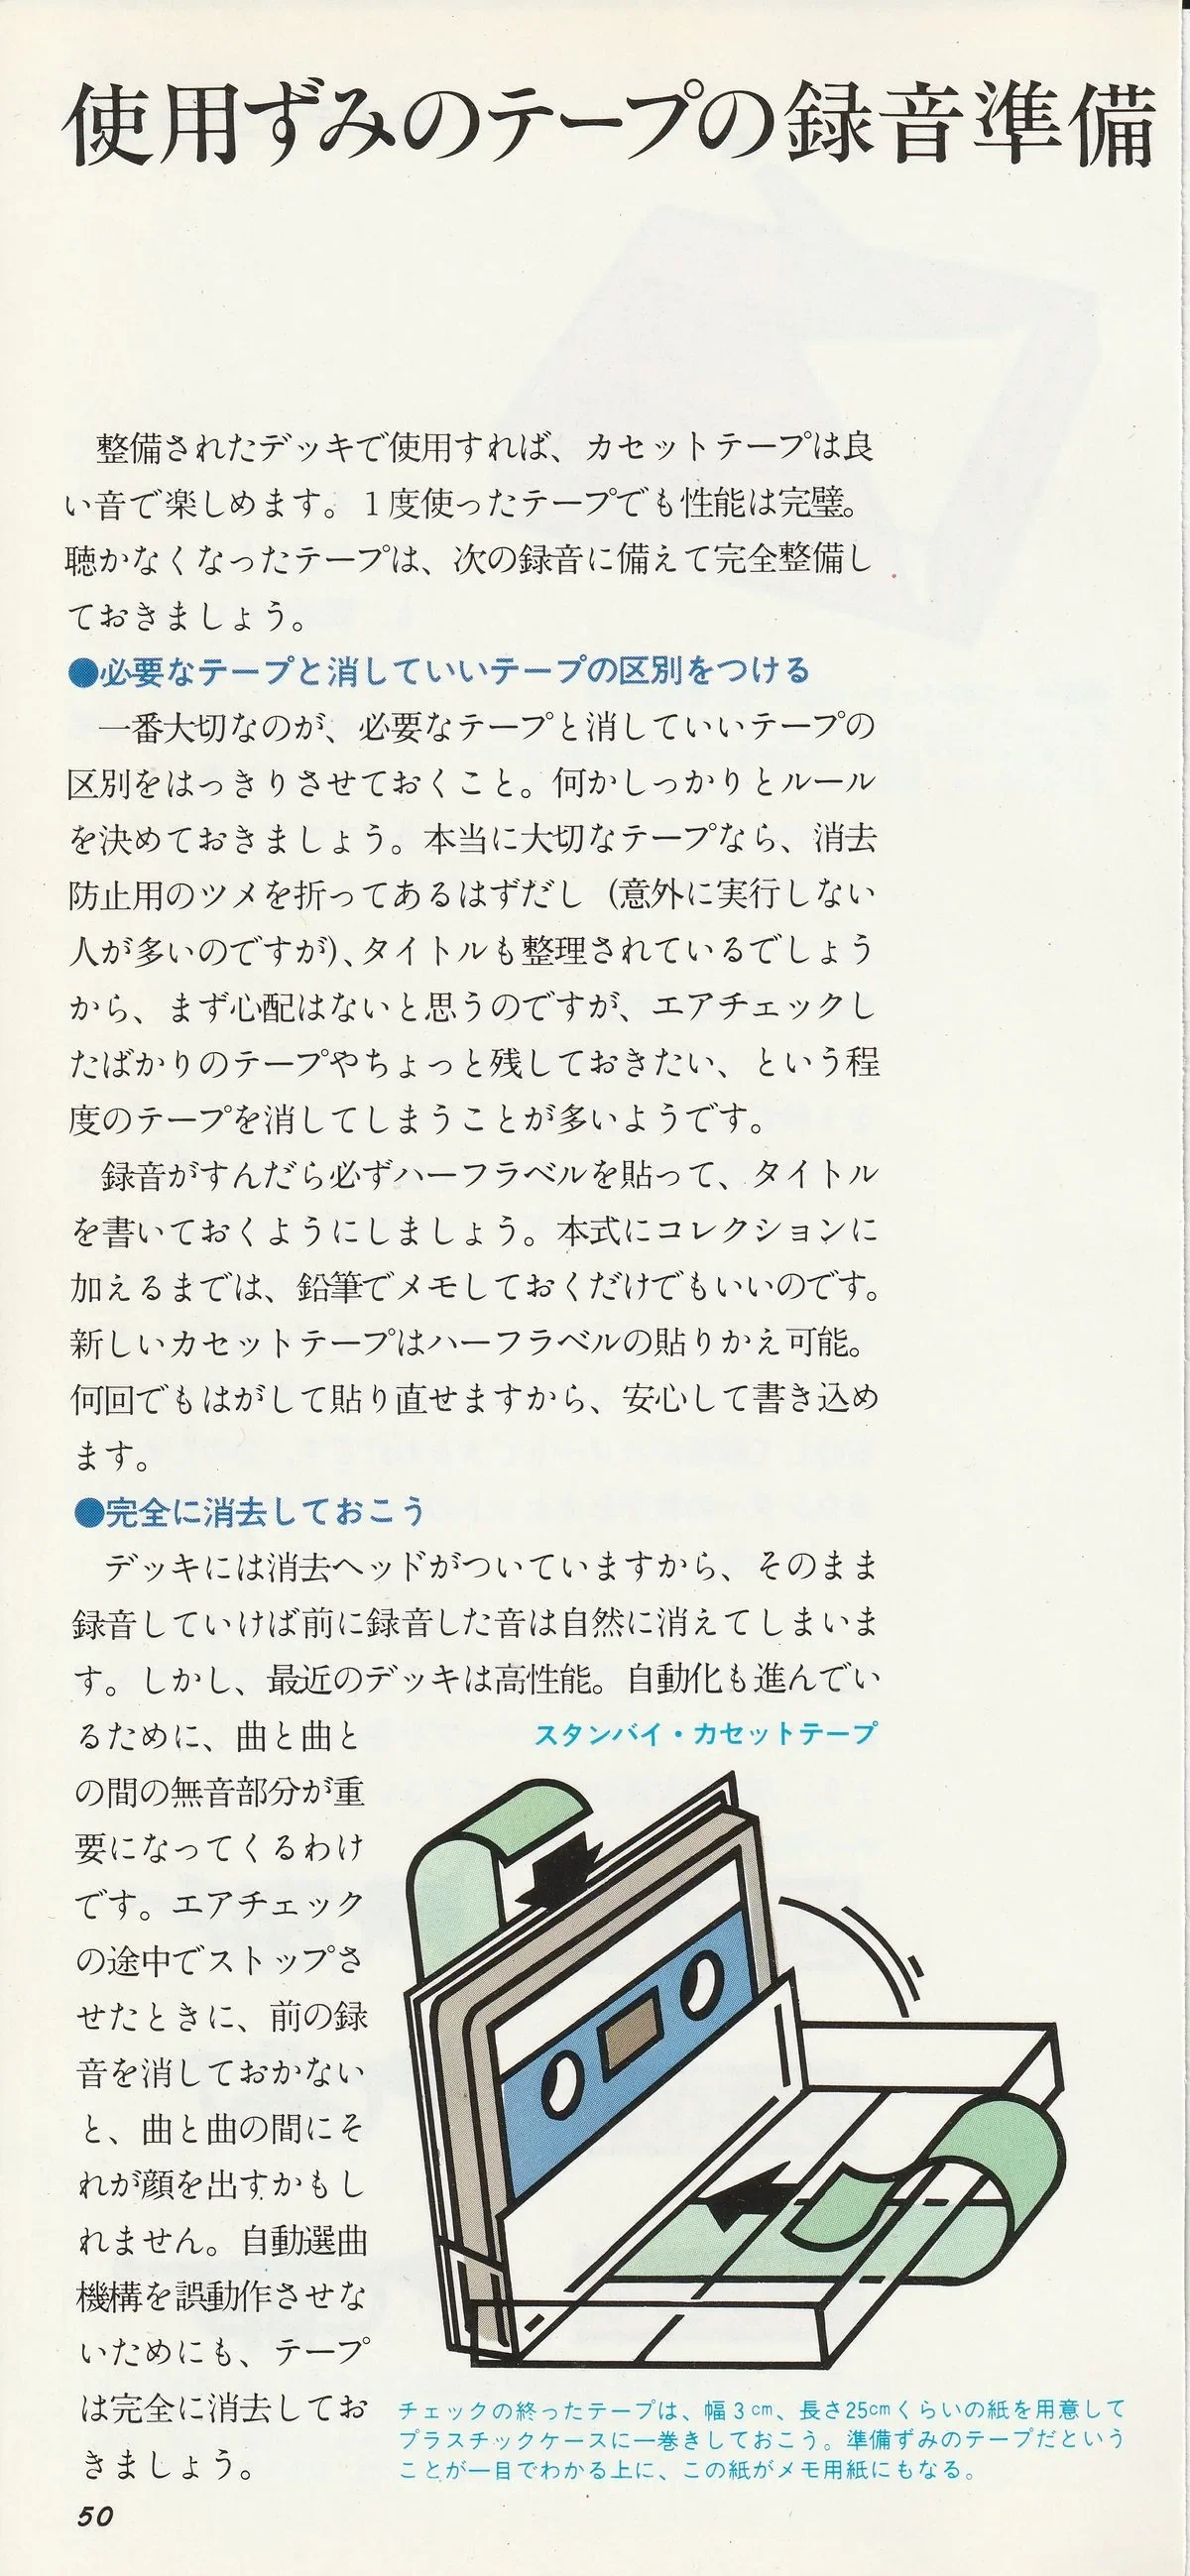
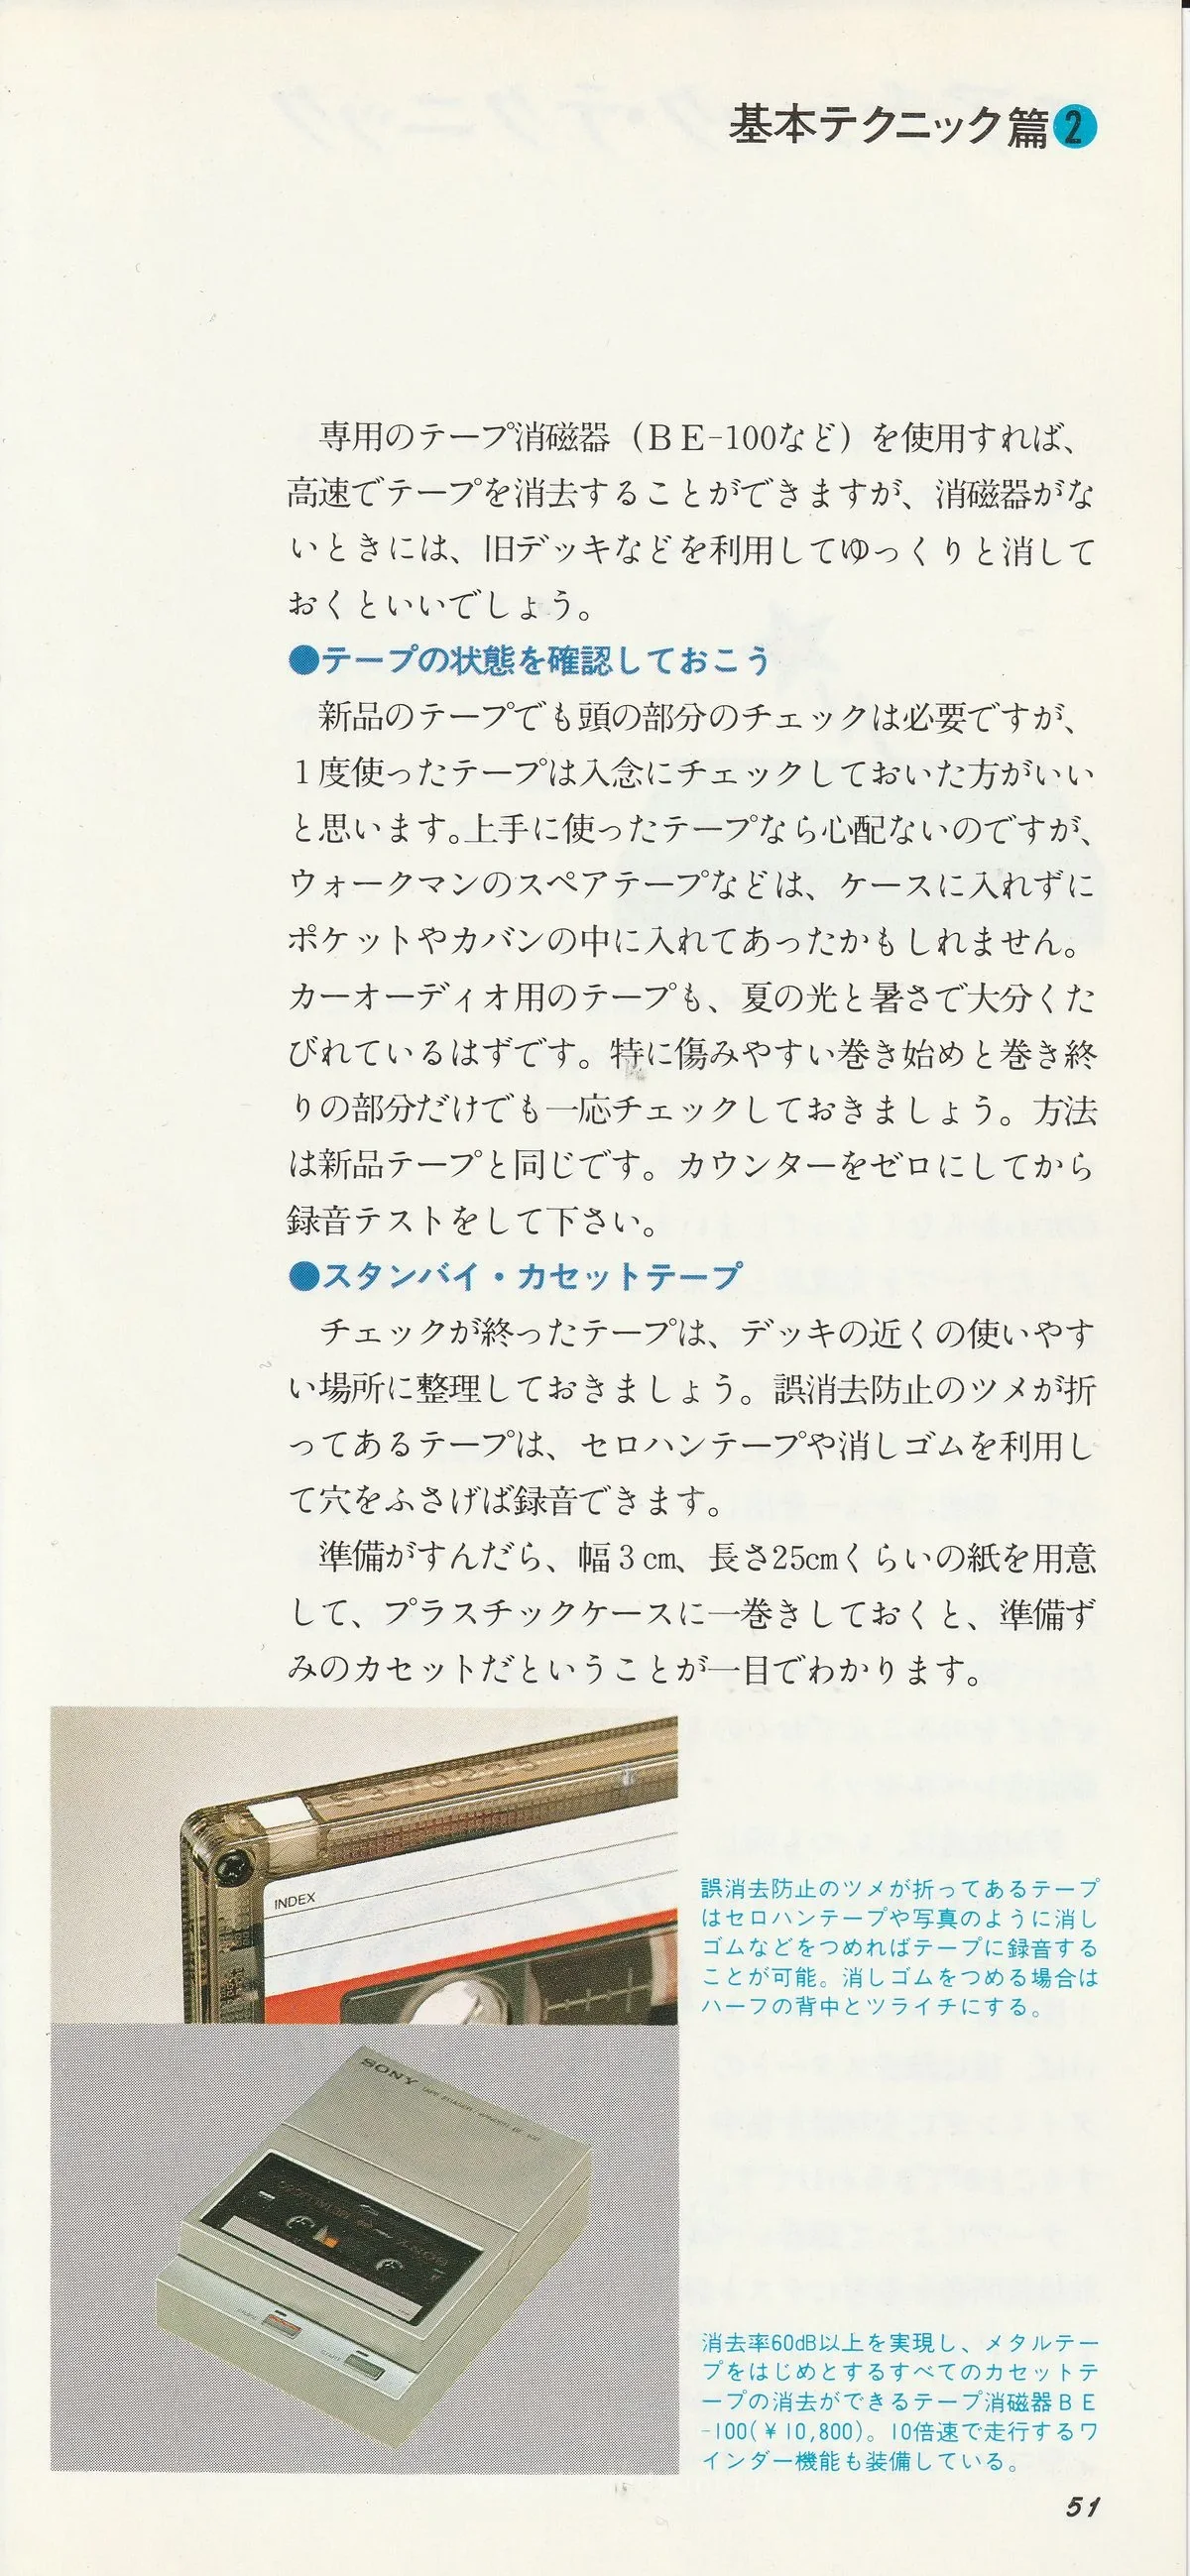
Keep checked tape in a convenient place near the deck. Tape with the erase-protection tabs broken off can be recorded again by covering the holes with adhesive tape or inserting an eraser.
Once prepared, wrap the case with a paper strip 3 cm wide and about 25 cm long. At a glance you can see that the cassette is ready to record.
A prepared cassette (caption to page 50): Wrap a checked tape’s plastic case with a paper strip 3 cm wide and about 25 cm long. You can see at a glance that the tape is prepared, and the strip also serves as a note sheet.
Restoring the erase-protection tab (caption to page 51): Record again on tape with a broken-off tab by covering the hole with adhesive tape or, as pictured, inserting an eraser. If using an eraser, make it flush with the top edge of the shell.
BE-100 demagnetizer (caption to page 51): The BE-100 tape demagnetizer (¥10,800) achieves more than 60 dB erasure and erases all cassette tapes, including metal. It also has a ten-times-speed winding function.
Recording Broadcasts
FM broadcasting is a treasure house of music. The airwaves are full of sounds with a charm unavailable on records. Enrich your music library with skillful off-air recording.
Timing Is Everything in Off-Air Recording
An off-air recording cannot be redone. The timing of the start determines everything.
First plan how you will record: whether to include track announcements and commentary and whether to cut advertisements. Unless you decide firmly, later you may not understand why you made the recording at all. In other words, will the broadcast tape be a finished product or raw material for later editing?
If making a finished product in one take, the timing of the start is especially important. Unlike a live recording, nobody gives you an advance cue, so concentrate on listening and wait for the music to begin. If you have properly checked the deck’s starting speed, the beginning of the program should not be lost. It is also important to absorb the program’s general structure and the DJ’s habits.
Setting the Recording Level
FM broadcasting can be regarded as a stable signal that always arrives under the same conditions, so you only need to set the recording level once and can then concentrate on timing the start.
The level depends on the tape, so make a test recording according to the deck’s instructions and find the optimum level for each tape. Narration in FM broadcasts is generally relatively loud, so if narration and advertisements do not overload, things are probably fine. Special programs may be louder than usual, however, so check the schedule in an FM magazine and lower the level slightly.
Timer Recording
Use this technique for late-night broadcasts or when you are busy and might forget the program time. Prepare a timer and you can record the program reliably. A synthesizer tuner is convenient: if it switches each time the timer turns on or off, you can even record different programs in succession.
Check the Antenna
Surprisingly many people use the indoor antenna supplied with the tuner. Reception may seem to sound good, but after making and listening to a broadcast recording, unexpected noise often turns out to be mixed in. Be sure to install a proper antenna. If an indoor antenna is sufficient for reception, a simple Yagi antenna is enough. An investment of ¥5,000 should improve the sound remarkably. Reception can change when buildings are constructed nearby, so check occasionally for noise or distortion.
Always Label the Tape
Write the title on a broadcast tape immediately. A pencil note is enough. This prevents the risk of erasing an important broadcast recording. Learn long relay-recording and editing-copy techniques too, and enjoy making excellent broadcast recordings.
Copying Records
Copying records for a Walkman or car audio system is another important technique. Collect your favorite pieces and make an enjoyable tape.
Respect Copyright
Records and music cassettes state that unauthorized recording is prohibited by law. Copyright does allow copying for personal use, however, so you can make your own original tape without concern.
“Personal use” means yourself and family members living with you. Copying a record for a friend or relative is illegal. Even if family members use it, a background music tape for a shop is a problem. Commercial use is not personal enjoyment. Giving such a cassette to a snack bar is also an infringement. Respect copyright and create an enjoyable world of tape audio.
Setting the Recording Level
Unlike FM broadcasts, records often differ markedly in volume, so it is better to set the recording level carefully.
First hold the record up to the light. Some sections have wide grooves; these are the louder sections. Play them and set the recording level accordingly. The level depends on the cartridge, so make a test recording before the main one as a rule. Unlike an off-air recording, you can redo it as often as you like, so vary the level and find the optimum.
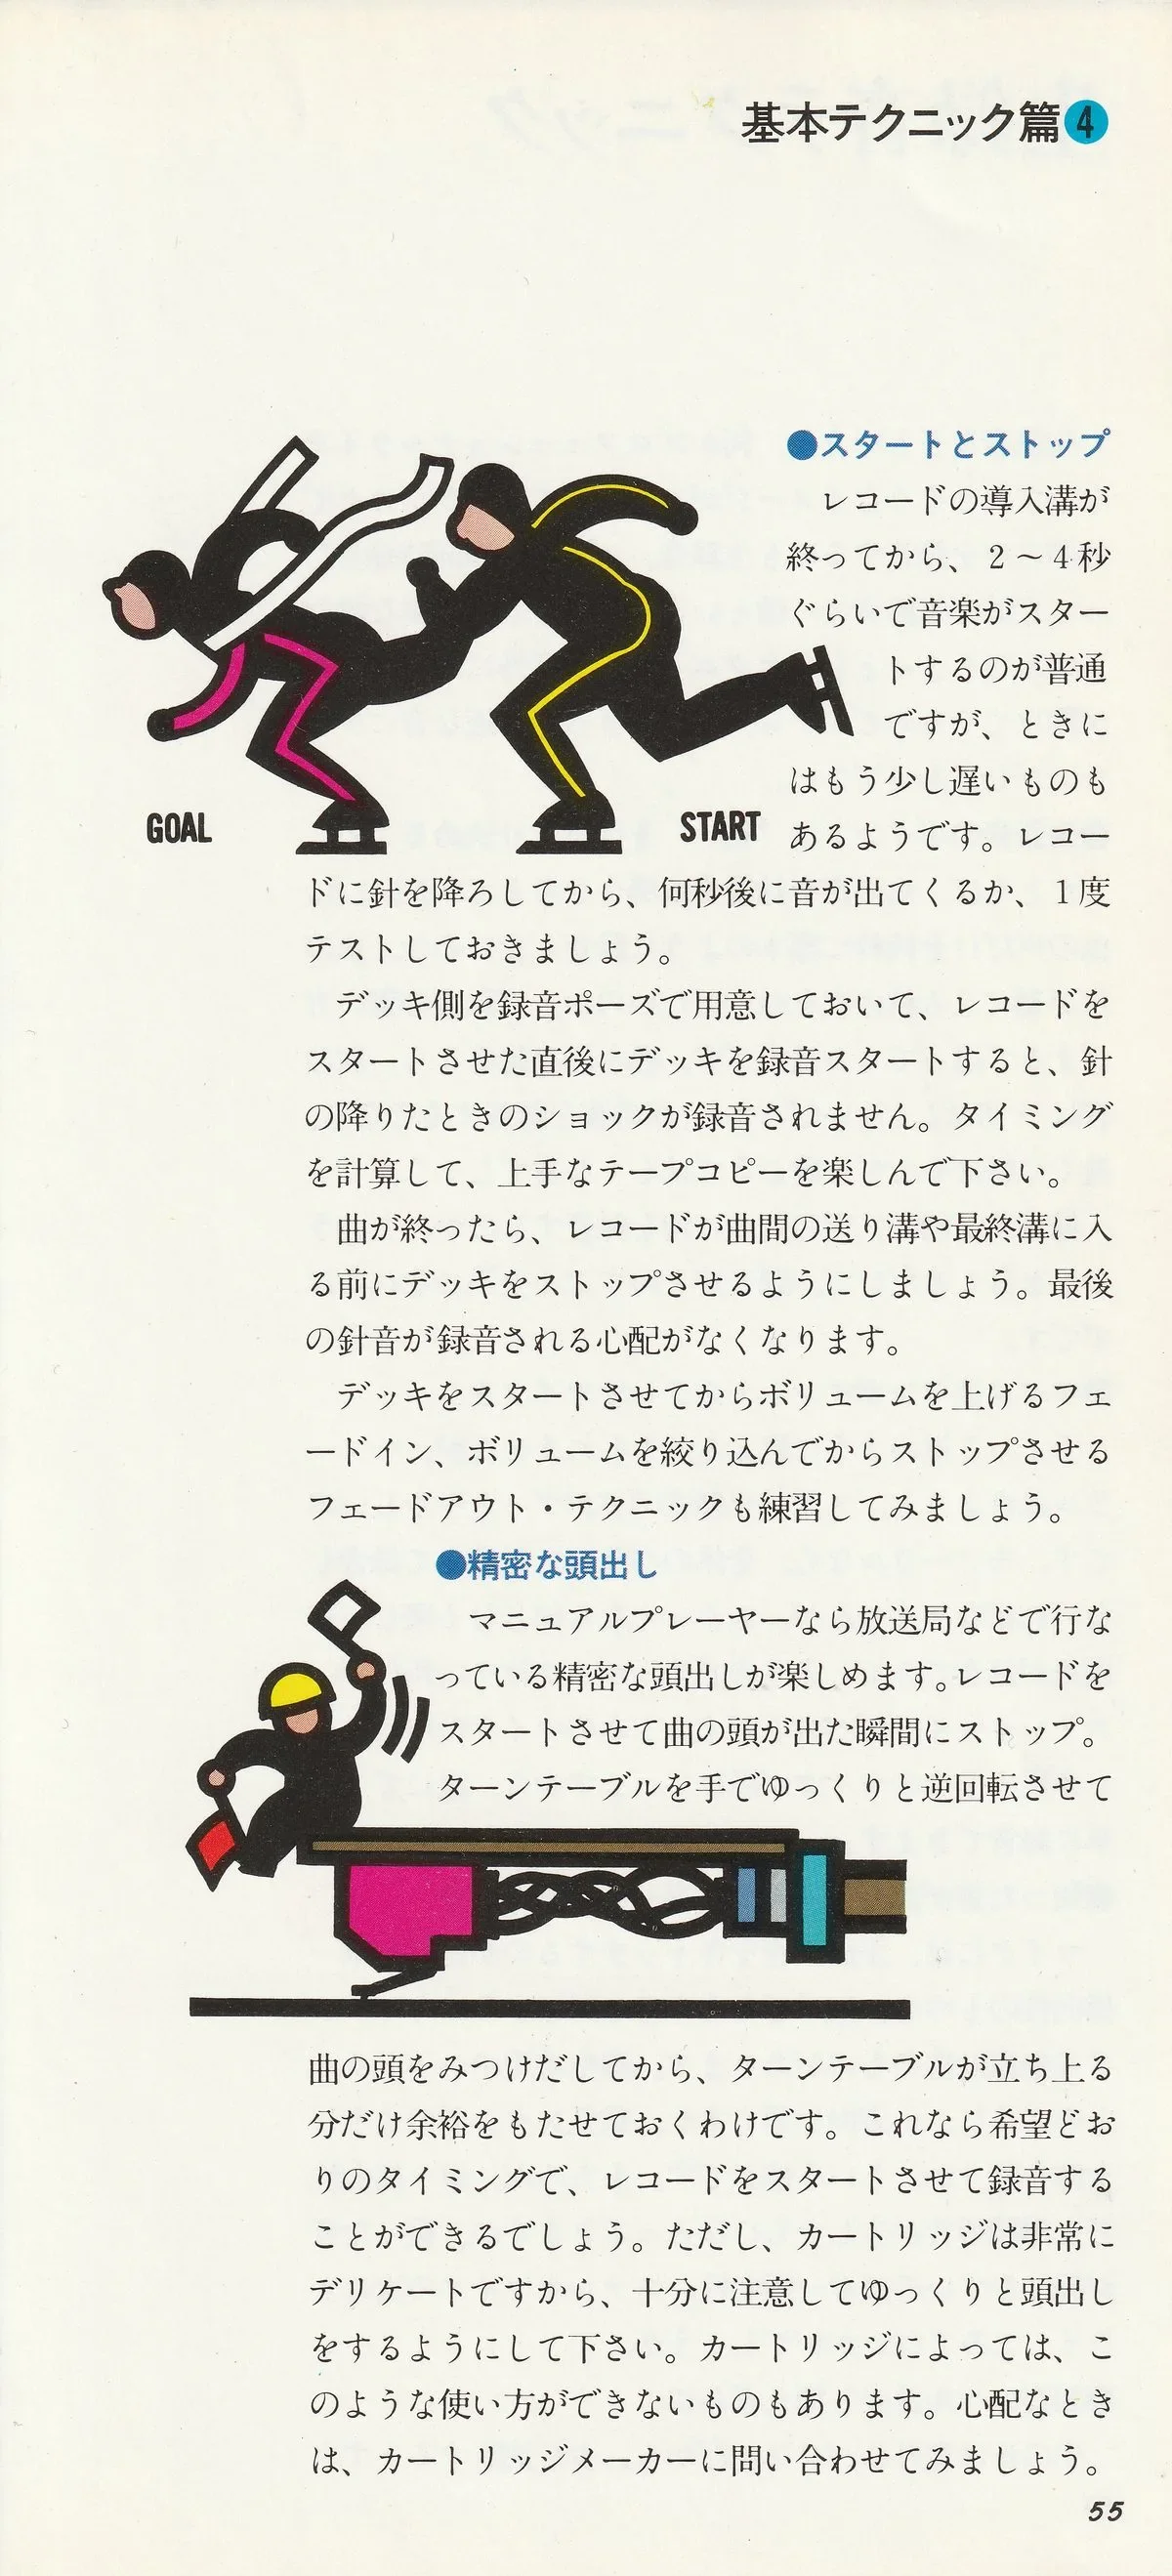
Start and Stop
Music normally starts two to four seconds after the end of the lead-in groove, though sometimes a little later. Test how many seconds pass between lowering the stylus and the sound beginning.
Put the deck in recording pause and start recording immediately after starting the record. The impact of the stylus being lowered will not be recorded. Time it and enjoy skillful tape copying.
When the track ends, stop the deck before the stylus enters the connecting groove between tracks or the run-out groove. This avoids recording the final stylus noise.
Also practice fading in - raising the volume after starting the deck - and fading out - stopping the deck after lowering the volume.
Precise Track Cueing5
On a manually operated turntable you can cue the beginning precisely, as radio stations do. Start the record and stop when the track begins. Slowly turn the turntable backward by hand to find the beginning, then move back far enough to allow the platter to reach speed. You can then start the record and recording at exactly the right moment. The cartridge is very delicate, however, so cue very slowly and carefully. Some cartridges cannot be used this way. If in doubt, contact the cartridge manufacturer.
Live Recording
Live recording sounds professionally difficult, but recording your friends’ voices on a radio-cassette recorder is also live recording. Recording karaoke as it happens is a perfectly respectable kind of live recording. Simple equipment and a little skill open up a surprisingly enjoyable world, so be bold and try recording sounds close to you.
Clearly Define Your “Target”
Suppose, for example, that we record the chirping of insects. The approach differs completely depending on whether you want a clean reference recording of the chirping or an autumn night in which chirping can be heard. A reference recording needs no other sounds, whereas for an autumn night you might want the distant melody of a village festival too.
Simply thinking before recording about what you are recording and why can make you remarkably skillful.
Microphone: One-Point Stereo Microphone6
It may seem paradoxical, but stereo recording is much easier than mono. Mono requires thought about the overall balance, whereas stereo somehow captures an enjoyable atmosphere by itself. A one-point stereo microphone is best. Two microphones for stereo are hidden inside one body, so anyone can record.
A Unidirectional Microphone Is Convenient for a Target Sound
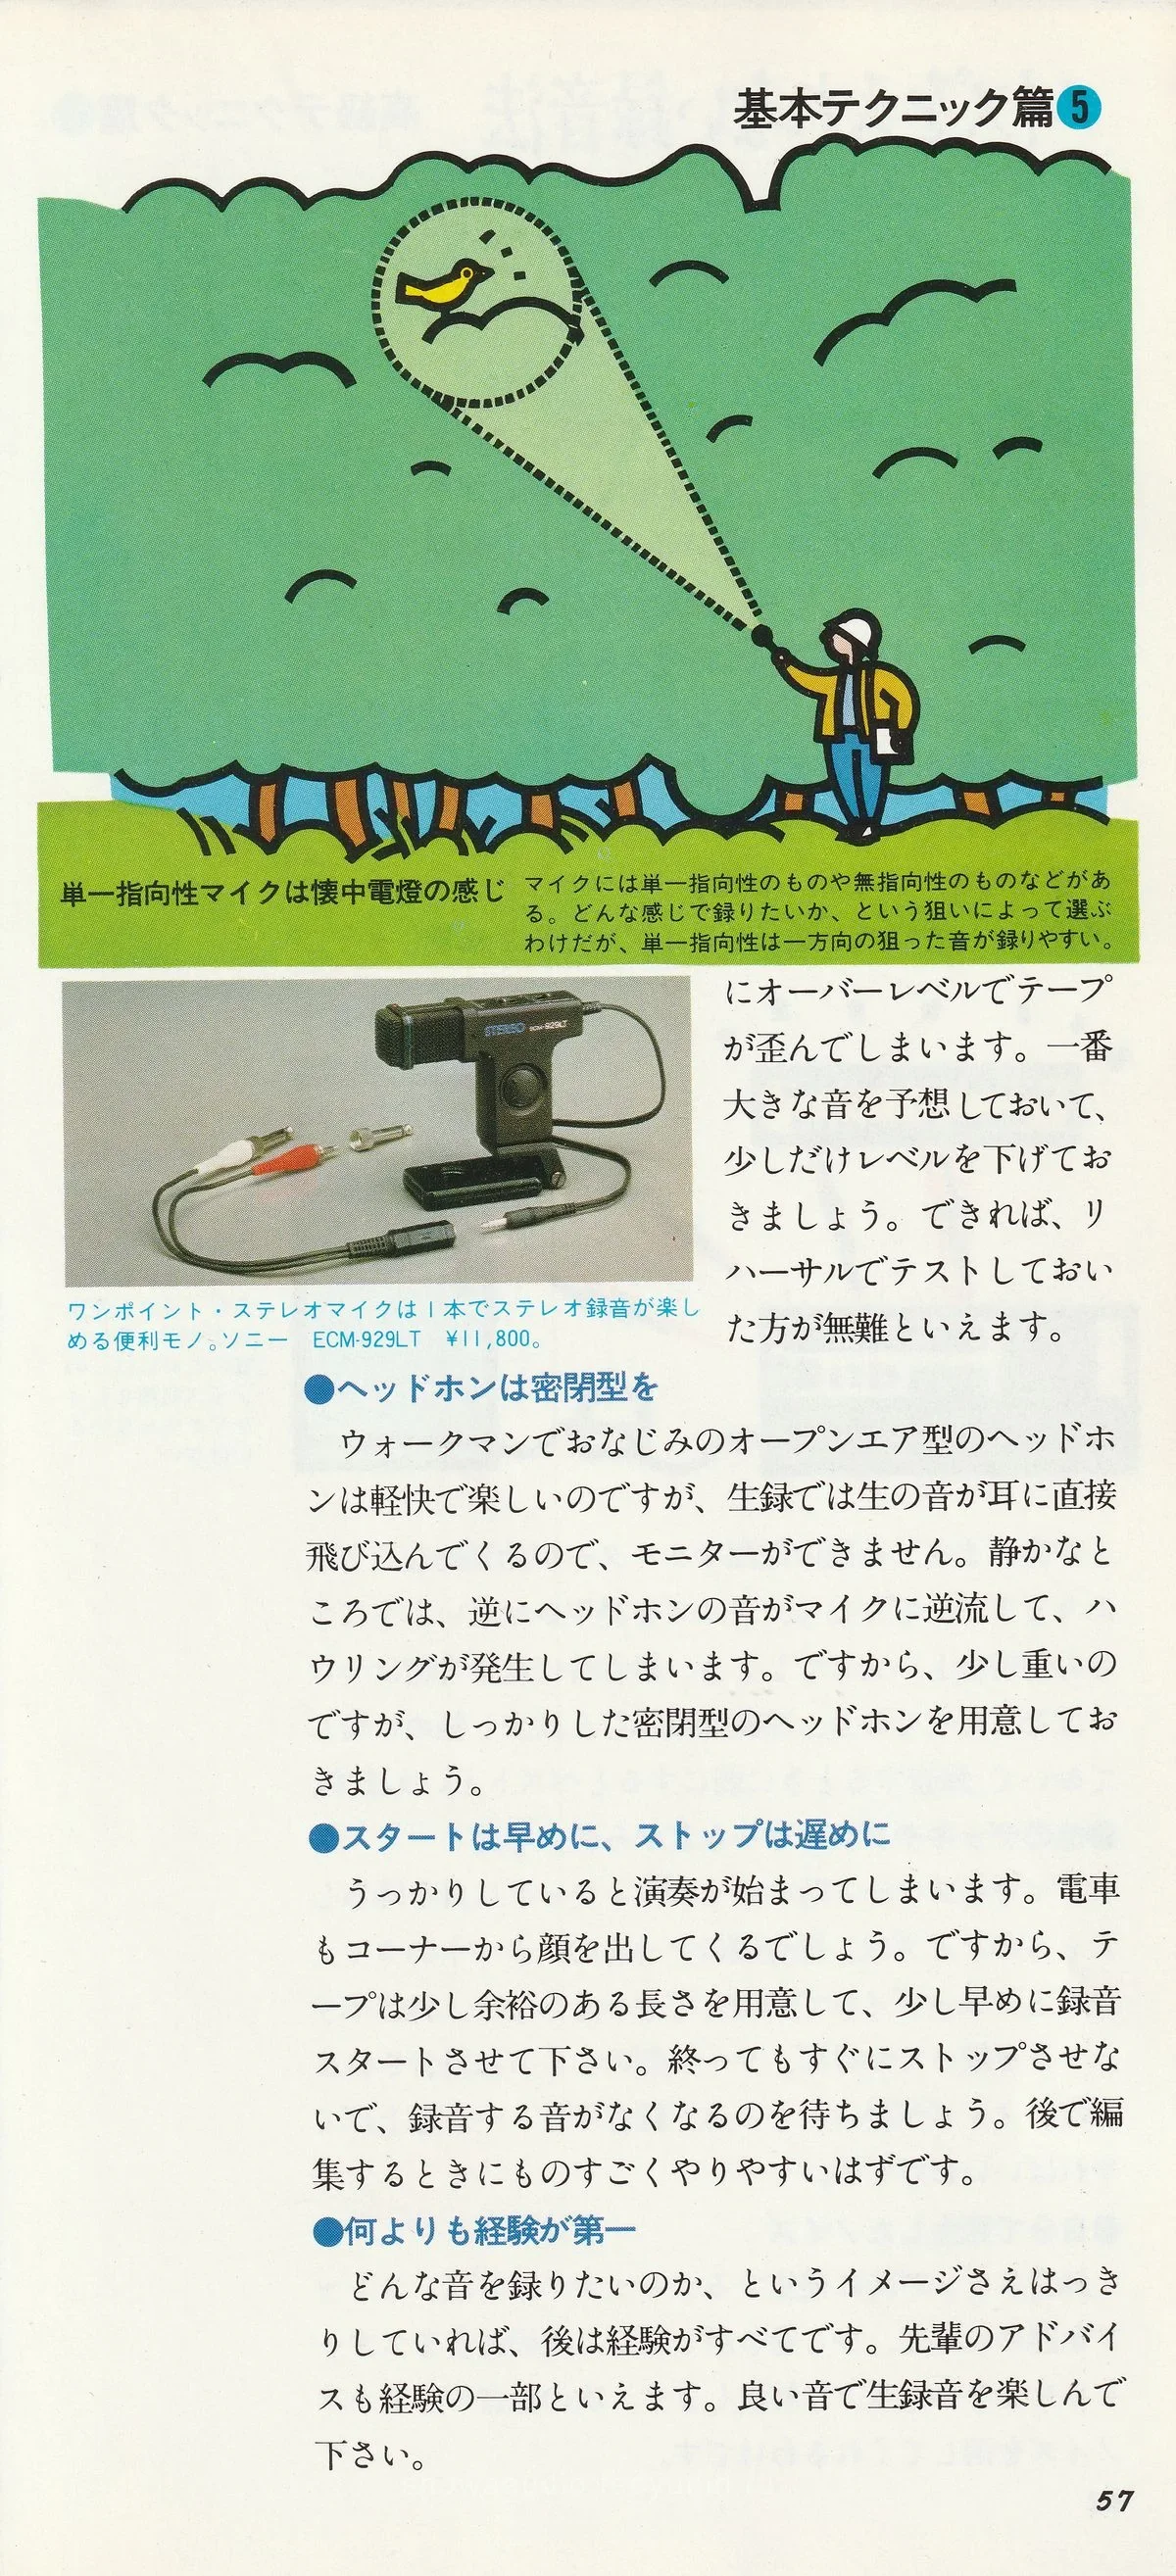
Microphones include unidirectional types, which pick up sound well from the front, and omnidirectional types, which pick it up equally from all 360°. This is like a flashlight or headlamp shining in one direction versus a table lamp illuminating everything around it. A unidirectional microphone of course also picks up some surrounding sound, but it is convenient for the target sound. After a stereo microphone, why not try one?
Keep the Recording Level a Little Lower
Live sound is surprisingly powerful, so a moment’s inattention can overload and distort the tape. Estimate the loudest sound and set the level a little lower. If possible, a test recording at rehearsal is the most reliable approach.
Use Closed-Back Headphones
The open headphones familiar from the Walkman are pleasantly light, but during live recording the sound reaches your ears directly, making monitoring impossible. In a quiet place, conversely, sound leaks from the headphones into the microphone and causes feedback.7 So prepare close-fitting closed-back headphones, even if they are heavier.
Start Earlier, Stop Later
Look away and the performance has already started. The train has already appeared around the bend. So prepare enough tape and start recording a little early. When it finishes, do not stop immediately; wait until the sound being recorded has disappeared. This will be extremely convenient when editing later.
Experience Above All
If you have a clear idea of the sound you want to record, the rest is a matter of experience. Advice from a more experienced friend is also part of experience. Enjoy live recording with good sound.
A unidirectional microphone is like a flashlight (caption to page 57): Microphones include unidirectional, omnidirectional and other types. Choose according to the “target” and how you want to record it. A unidirectional microphone conveniently captures a target sound from one direction.
ECM-929LT one-point stereo microphone (caption to page 57): A one-point stereo microphone is convenient because one body provides stereo recording. SONY ECM-929LT, ¥11,800.
Примечания
-
A pinch roller is a rubber roller in the transport mechanism that presses tape against the capstan for stable travel. ↩
-
A capstan is the metal shaft in the transport mechanism that sets tape speed. ↩
-
Erase-protection tabs are the two tabs on the top edge of a cassette. Breaking them off prevents the deck from recording over it accidentally. Recording can be restored with adhesive tape or a piece of eraser. ↩
-
An air check is a home recording of a radio broadcast, often FM, onto tape to preserve songs, a radio hobby of the 1970s and 1980s. ↩
-
Head-cueing is precise positioning of a record stylus at the beginning of the desired track, manually or with a deck function, a standard radio-studio technique. ↩
-
A one-point stereo microphone contains two directional elements at 90° in one body, giving a stereo image without positioning two microphones. ↩
-
Feedback, or howling, is unwanted self-oscillation in a microphone-amplifier-loudspeaker or headphone system when the microphone picks up its own amplified signal and forms a loop. ↩