
What Is Sound?
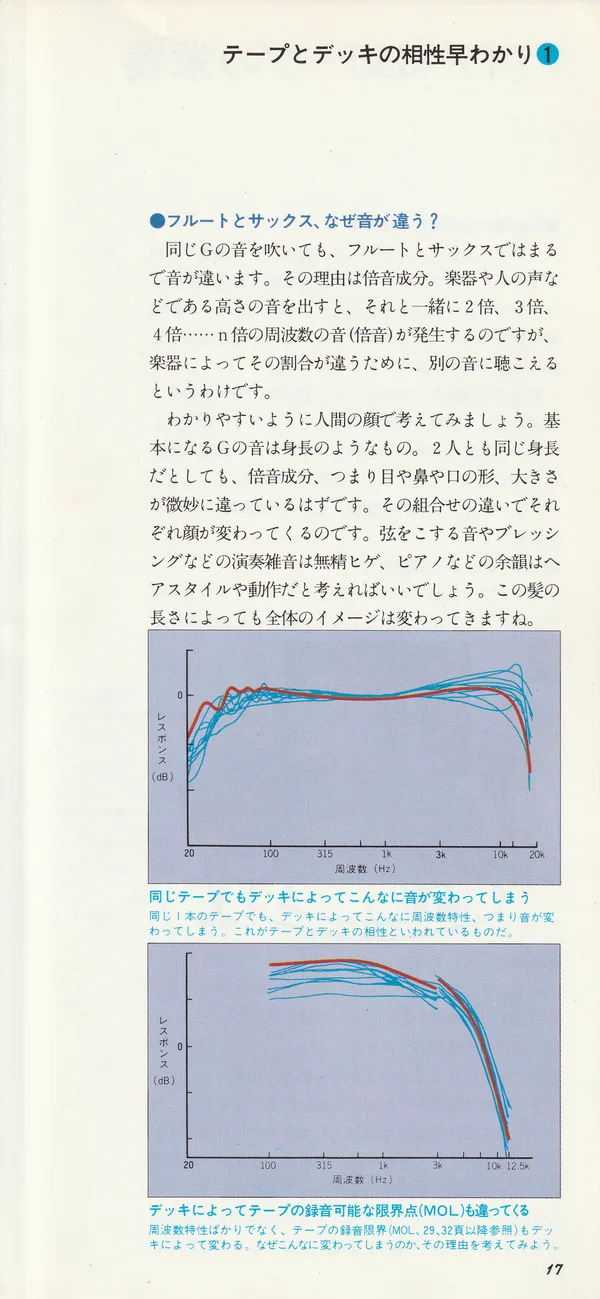
The same tape sometimes sounds different depending on the deck. Neither is at “fault” - rather, like lovers, they produce a happy sound or a calm, gentle sound depending on the partner. This is called tape and deck compatibility. Naturally, we want to choose a better combination.
But there are too many combinations of tape and deck to check every one. Instead, let’s consider why this compatibility arises. Perhaps we can then find a clue to choosing the best combination ourselves. To do that, it seems we must first understand what “sound” is.
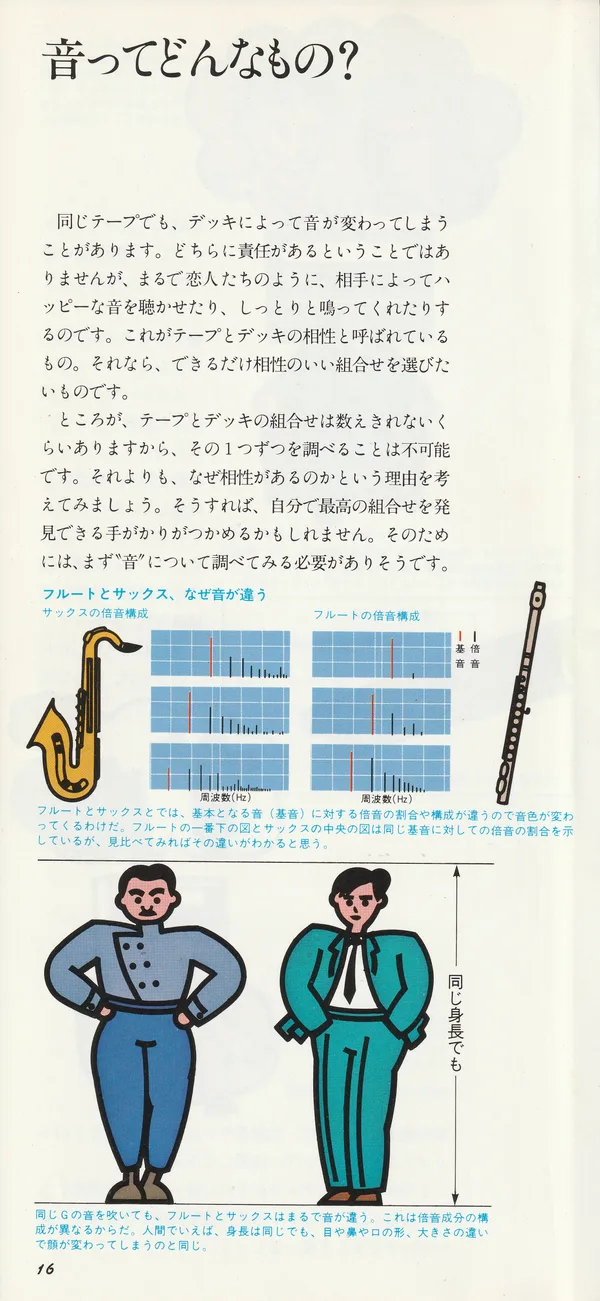
Why Do a Flute and a Saxophone Sound Different?
Even when playing the same G note, a flute and a saxophone sound completely different. The reason is their harmonic components. When an instrument or human voice produces a note of a given pitch, sounds with frequencies two, three, four… n times higher (harmonics) also arise. Their proportions differ between instruments, so the sounds are heard differently.
To make this clearer, think of human faces. The fundamental G note is like a person’s height. Even if two people are the same height, their harmonic components - the shape and size of their eyes, nose and mouth - will surely differ a little. The different combinations give each face its own character. Performance noises such as fingers sliding on strings or breathing can be imagined as stubble, while the lingering sound of a piano is like a hairstyle or movement. Hair length changes the overall impression too, doesn’t it?
Even the same cassette can have a very different frequency response - and therefore a different sound - on different decks. This is called tape and deck compatibility. Not only frequency response changes, but also the tape’s recording limit (MOL).
Bias Is Nourishment for Tape
Frequency Response Determines Tone
Since we record sound rich in harmonic components, the tape and deck must capture those harmonics accurately in the same proportions. Frequency response shows this ability. If it is flat, the harmonic components are recorded and reproduced accurately.
As with modern high-quality tapes, slightly raising the response at very high frequencies to reproduce delicate harmonics more clearly is an effective technique. But if the frequency response changes too abruptly, the tone becomes unnatural. Tape and deck compatibility appears to be connected with this frequency response.
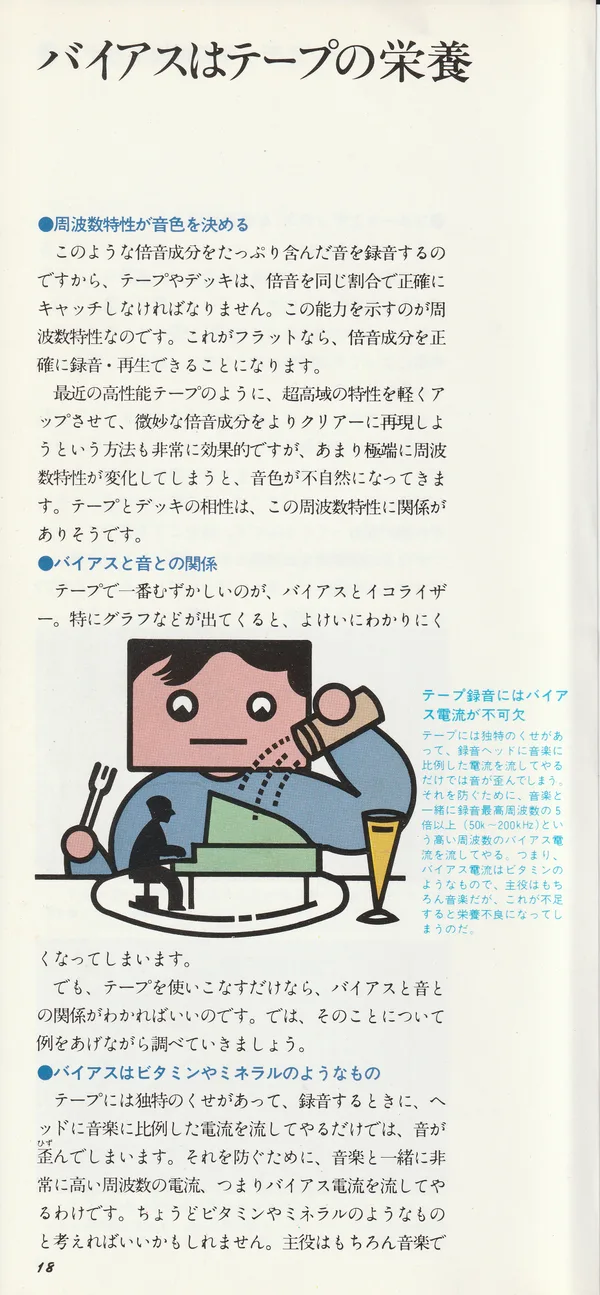
Bias Is Like Vitamins and Minerals
The most difficult things about cassette tape are bias and equalization. Once graphs appear, they become even harder to understand. But to use tape properly, you only need to understand the relationship between bias and sound. Let’s look at some examples.
Tape has particular characteristics: if, during recording, current proportional to the music alone is supplied to the head, the sound distorts. To prevent this, a very high-frequency current - at least five times the highest recording frequency (50-200 kHz) - is supplied along with the music. This is bias current. You can think of it as vitamins and minerals. Music of course plays the leading role, but without enough of these, exhaustion sets in.
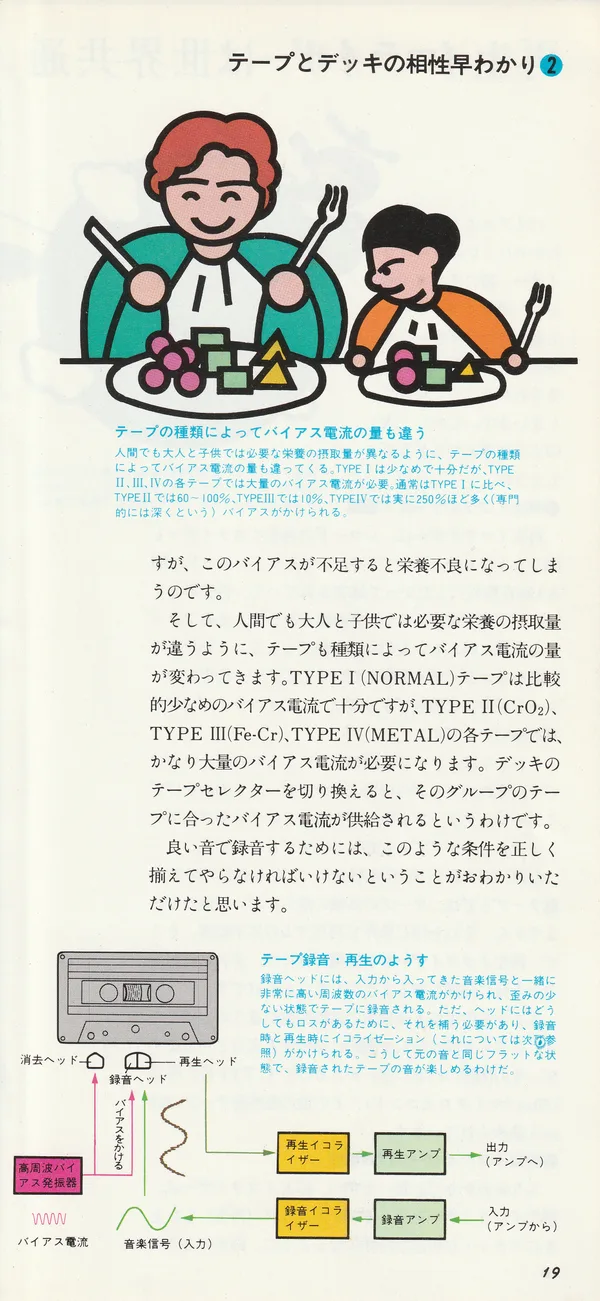
Just as adults and children need different amounts of nourishment, different tape types need different amounts of bias current. TYPE I (NORMAL) needs relatively little, while TYPE II (CrO₂), TYPE III (Fe-Cr) and TYPE IV (METAL) need considerably more. Compared with TYPE I, TYPE II normally receives 60-100% more bias, TYPE III 10% more, and TYPE IV as much as 250% more (specialists say “deeper” bias). Switching the deck’s tape selector supplies the bias current suited to that group of tapes.
How tape recording and playback work. Very high-frequency bias current is supplied to the recording head along with the input music signal, allowing recording with minimal distortion. However, losses in the head are unavoidable and must be compensated for, so equalization is applied during recording and playback. This lets us hear the sound recorded on tape with the same flat response as the original.
Playback Equalization: A Worldwide Standard
Equalization is even harder to understand than bias; being told that there are separate playback and recording equalizers can be thoroughly confusing. But let’s think of it this way.
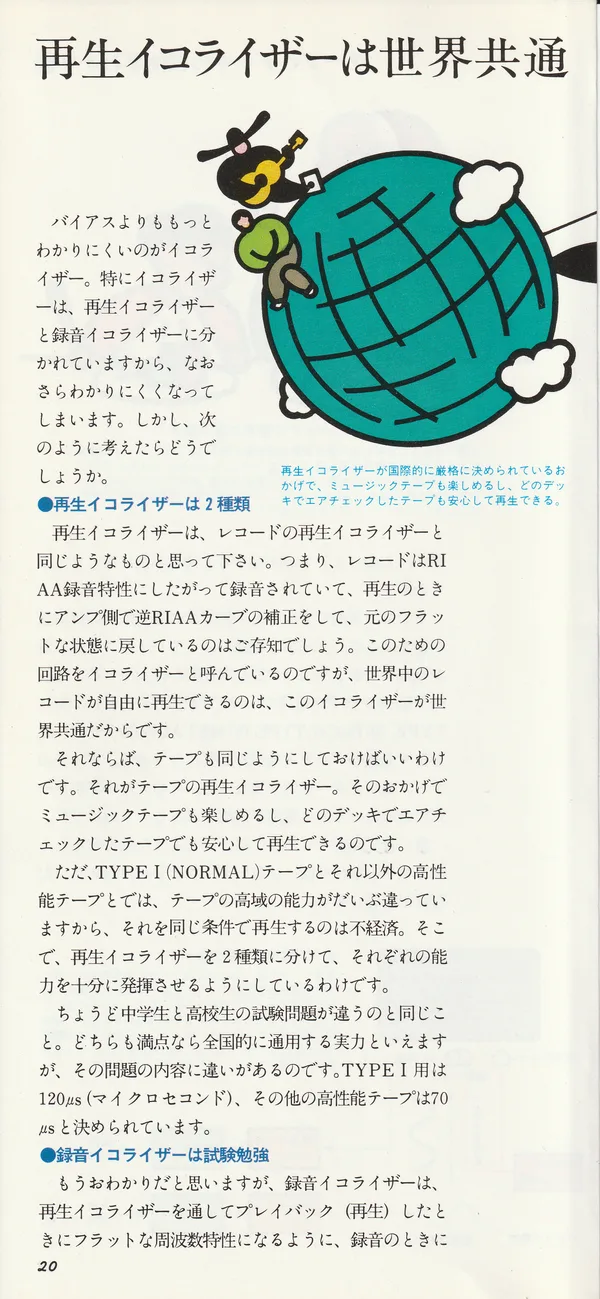
Playback equalization is strictly defined by international standards, and the same tape can be played on any deck in the world.
Two Types
Think of playback equalization as the same thing used when playing records. Today, records are cut using the RIAA recording characteristic, and on playback the amplifier applies the inverse RIAA curve to restore the original flat response. This circuit is called an equalizer, and wherever in the world you buy a record, the equalization is the same worldwide.
The same needs to be done with tape, and that is tape playback equalization. Thanks to it, we can listen to prerecorded studio cassettes and safely play a broadcast recorded on any deck on another deck.
However, the output level of TYPE I (NORMAL) and other, more sensitive tapes differs markedly at high frequencies. To play them under equivalent conditions and let each tape fully demonstrate its capabilities, playback equalization is divided into two types.
It is like giving different examination questions to middle-school and high-school students: both can receive full marks, and both maximum scores are recognized equally throughout the country; only the questions differ. TYPE I uses 120 μs (microseconds), and all other types use 70 μs. The low-frequency value, 3180 μs, is common to all.
Recording Equalization Is “Exam Preparation”
Recording equalization makes corrections during recording so that playback through the playback equalizer produces a flat frequency response.
It is like preparing for an exam. If the tape and deck are good, you can study just a little and pass: in other words, less correction means less load and even better sound. Perhaps this is why sound can still differ even when the frequency response is the same.
The Deck’s Tape-Type Selector
On modern decks, switching the tape selector once usually changes the bias and both recording and playback equalization together. On decks with an automatic tape selector, the deck does everything for you.
However, some high-grade models and older decks switch bias and equalization separately, so take care. On such decks, for playback it is enough to switch only the equalizer selector.
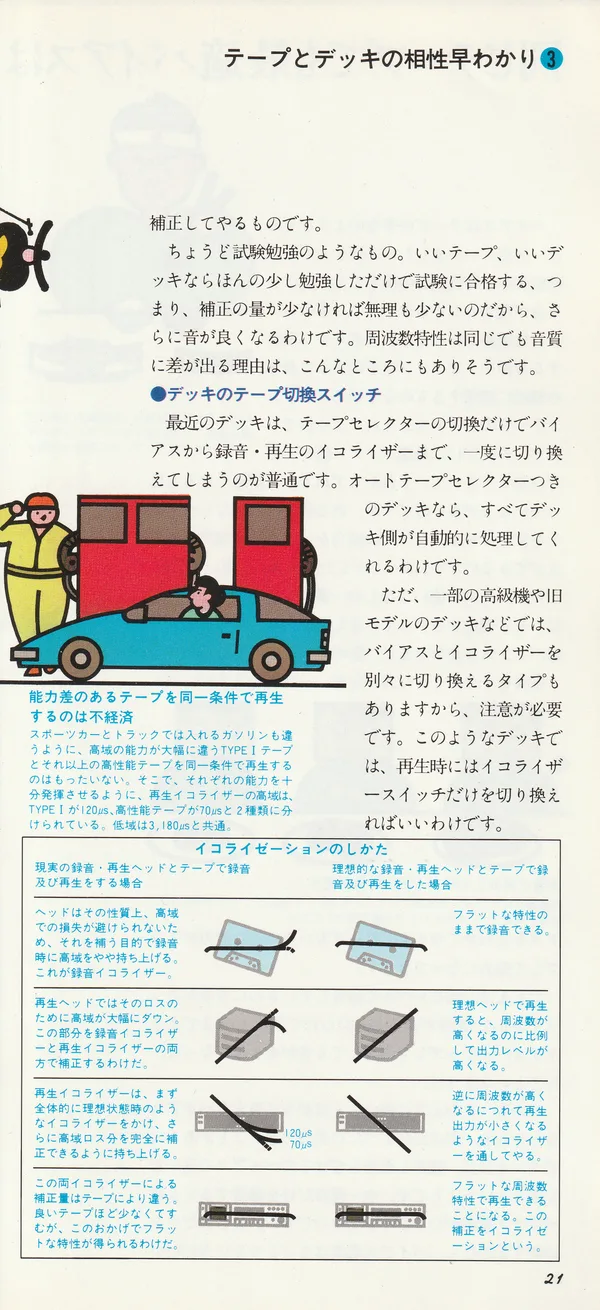
How equalization works. By its nature, the head inevitably has high-frequency losses. To compensate, high frequencies are raised slightly during recording. This is recording equalization. In the playback head, losses cause high frequencies to fall markedly, and this is compensated for by the two equalizers together. The amount of correction from the two equalizers differs with the tape. The better the tape, the less correction is needed, but it is this correction that produces a flat response.
Optimum Bias for the Same Tape
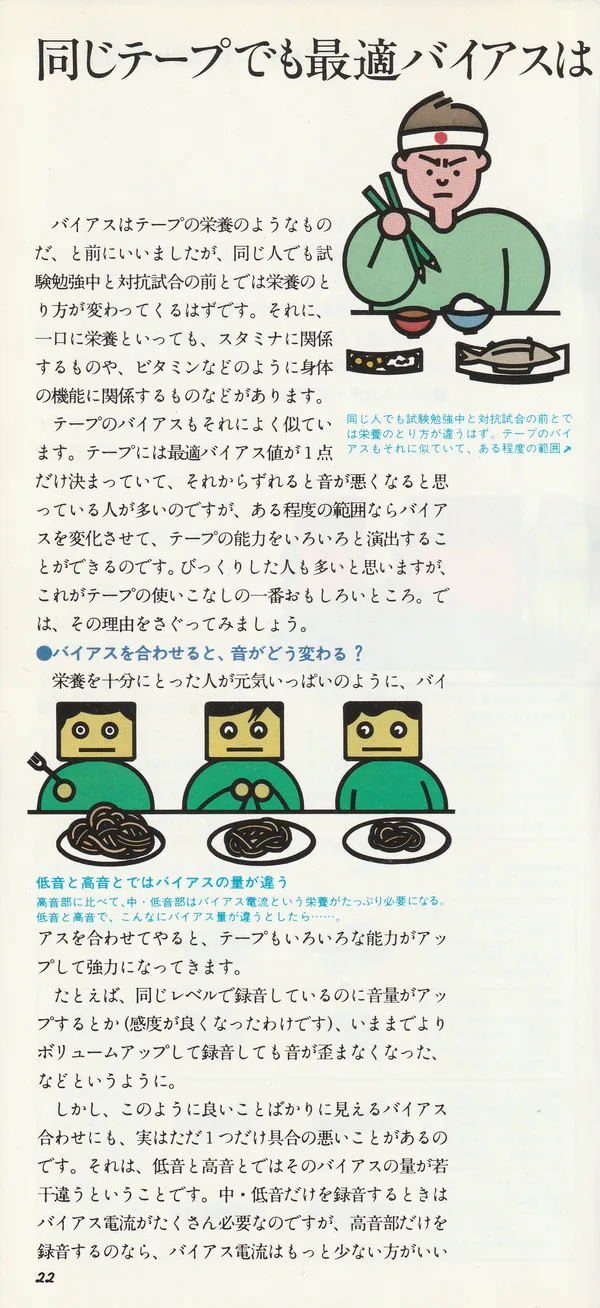
Earlier we said that bias is like nourishment for tape, but even the same person eats differently when preparing for an exam and before an important match. And by “nourishment” we mean both what relates to stamina and vitamins, which relate to the body’s functioning.
Tape bias is very similar. Many people think that a tape has only one precisely defined optimum bias value and that any deviation makes the sound worse. In fact, within certain limits, changing the bias can bring out different capabilities of the tape. This may surprise many people, but it is the most interesting part of knowing how to use tape. Let’s see why.
How Does Sound Change When Bias Is Set Correctly?
Just as a well-nourished person is full of energy, a tape gains various capabilities and becomes stronger when its bias is set correctly. For example, at the same recording volume, playback volume increases (that is, sensitivity improves), or the sound no longer distorts even when recorded louder than before.
But this apparently beneficial adjustment has one inconvenience: the amount of bias needed for low and high frequencies differs slightly. Mid and low frequencies require much more “nourishment” in the form of bias current than high frequencies. Recording only mid-low frequencies requires plenty of bias current, while recording only high frequencies is better with less.
How to Set Bias
What a problem! If low and high frequencies need different amounts of bias, it would seem impossible to set it for music containing both.
But to record music, we first need to understand what is in it. In most music, almost all the energy is concentrated in the mid-low frequencies; the high frequencies are mainly the instruments’ harmonic components, so their quantity is quite small. Let us therefore set bias to accommodate the energy of the mid-low frequencies reliably and find a way to deal with the high frequencies. Fortunately, high frequencies will be recorded under conditions of “too much bias current”, so sensitivity will decline, but there is no danger of distortion. We compensate for the drop in level with recording equalization.
This is precisely what designers consider when deciding where to set the bias of a deck. If they want to preserve mid-low frequency energy reliably, they set more bias; if they want to record high frequencies fully, they set less. In both cases recording equalization provides correction, producing a flat frequency response. Only the recording-level headroom differs.
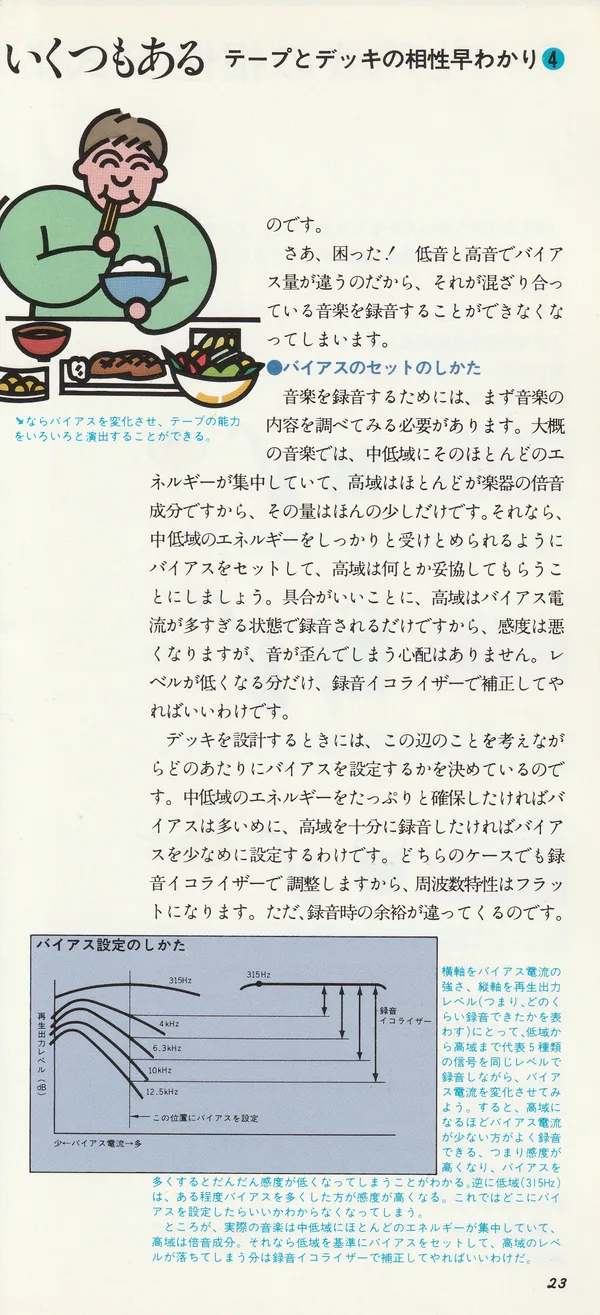
Bias current experiment. Put bias current on the horizontal axis and playback output level (how well the signal was recorded) on the vertical axis. Vary the bias current while recording five typical signals from low to high frequencies (315 Hz, 4 kHz, 6.3 kHz, 10 kHz and 12.5 kHz) at the same level. The higher the frequency, the better the recording at lower bias current - sensitivity rises - and as bias increases, sensitivity gradually falls. Conversely, at a low frequency (315 Hz), increasing bias somewhat increases sensitivity. It becomes unclear where to set the bias.
Tape and Deck Compatibility: A Collection of Formulas
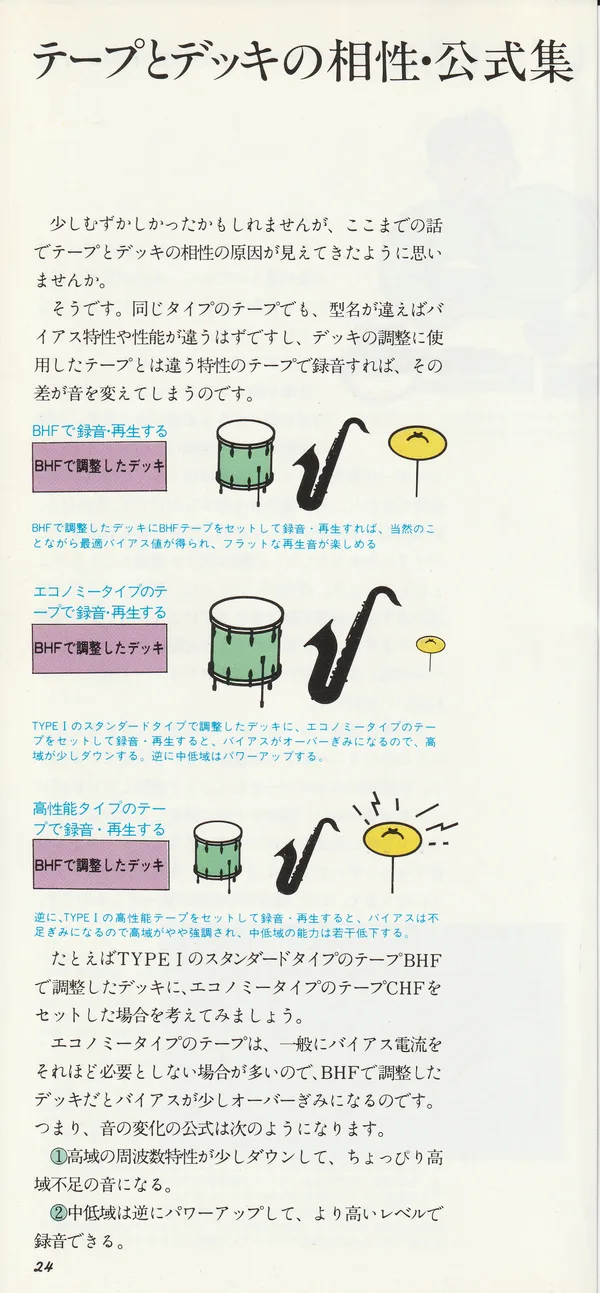
This may have been a little difficult, but after all that, the reason for tape and deck compatibility should be starting to emerge, shouldn’t it? Even among tapes of the same type, different models surely have different bias characteristics and parameters. If you record on a tape with characteristics different from those of the tape used to adjust the deck, that difference changes the sound.
For example, imagine putting an economy-class CHF tape into a deck adjusted for the standard TYPE I tape, BHF. Economy tapes generally need less bias current, so a deck adjusted for BHF will give them slightly too much. This produces the following “formula” for the change in sound:
- The frequency response drops slightly in the high frequencies, producing a sound with a slight lack of treble.
- The mid-low frequencies, conversely, become stronger, and recording at a higher level is possible.
Conversely, if recording on the powerful AHF tape:
- Bias is slightly insufficient, so the high-frequency response rises a little. The high frequencies are slightly emphasized.
- Recording capability in the mid-low frequencies often decreases slightly.
Compatibility Can Be Adjusted with Bias Trim
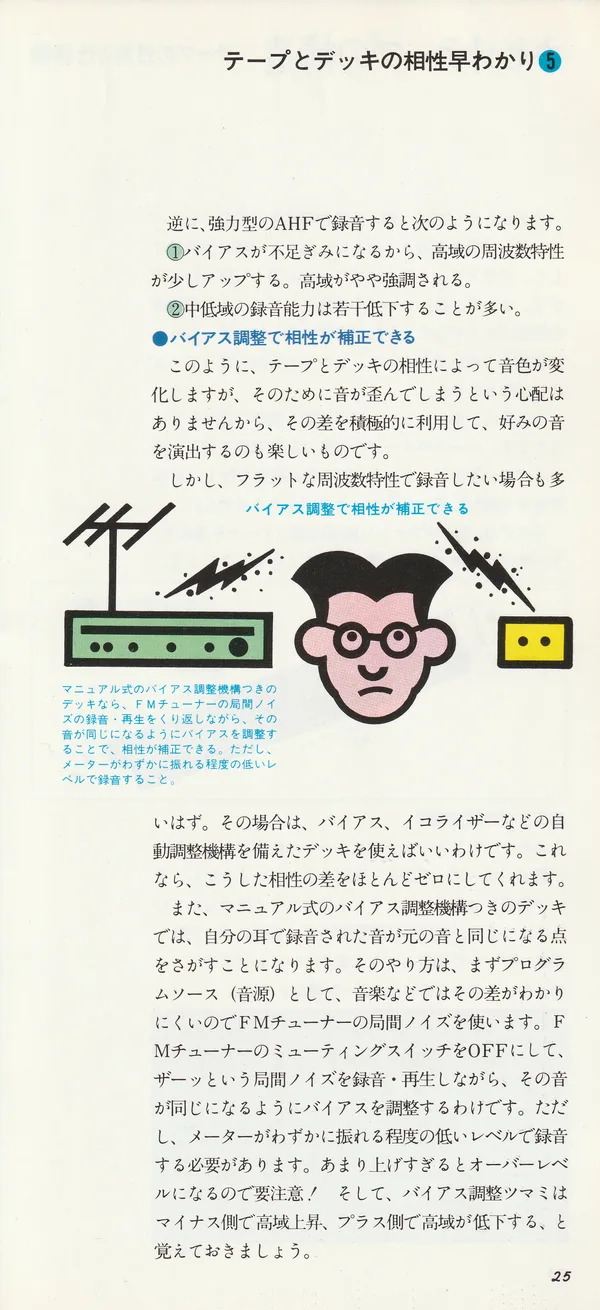
Thus the tone changes depending on tape and deck compatibility, but there is no danger of the sound distorting because of it. You can therefore make active use of the difference and enjoy choosing sound to your taste. Even so, you will often want to record with a flat frequency response.
In that case, use a deck equipped with automatic bias, equalizer and similar adjustment. These reduce compatibility differences almost to zero.
On a deck with manual bias adjustment, use your ears to find the point where the recorded sound matches the original. Music is not suitable as the program source because the difference is difficult to hear, so use the interstation noise of an FM tuner instead. Switch off the tuner’s mute function and, while recording and playing back the hissing interstation noise, adjust the bias until the sound is the same. Record at a low level, where the meter needle moves only slightly. If the level is raised too high, it will overload, so take care! Remember that turning the bias adjustment toward minus raises the high frequencies, while turning it toward plus lowers them.